How To Use RabbitMQ With Spring Boot REST API
-
 Lakshitha Warnakulasuriya
 - 24 Oct, 2023
In the realm of modern software development, two key players, RabbitMQ and Spring Boot, have joined forces to revolutionize the way applications communicate.
When building computer programs, it’s important for different parts of a program to talk to each other. Imagine a group of friends sending messages. They don’t always have to be in the same room to talk. They can send notes to each other. Similarly, in computer programs, there are tools like RabbitMQ that help different parts of a program communicate with each other, even if they’re not in the same place.
RabbitMQ is like a super-smart mailman for your computer programs. It makes sure that the messages get to the right place and that nothing gets lost. It’s especially helpful when a lot of people are trying to send messages at the same time.
In this guide, we’ll show you how to use RabbitMQ with Spring Boot to make your programs better.
Here RabbitMQ is supports multiple messaging protocols and streaming. For get more understanding about the RabbitMQ, please follow the RabbitMQ Documentation. Here is the simple architecture of RabbitMQ.
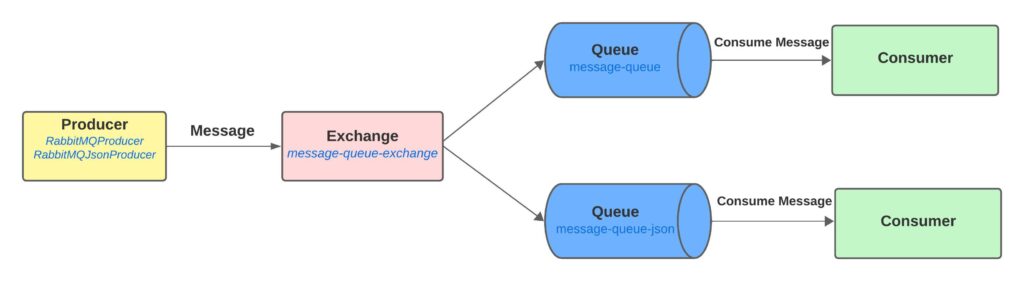
RabbitMQ with Spring Boot Development Flow
This Spring Boot REST API expose below mentioned operations with integration of RabbitMQ.
- Push single message to queue.
- Push json message to queue.
- Consume single message from queue.
- Consume json message from queue.
Technology stack which going to use in this tutorial,
- Java 17
- Spring Boot 3.1.3-RELEASE
- Spring for RabbitMQ
- RabbitMQ 3.12.4-management
- Lombok
- Docker – version 24.0.6
- IntellijIdea for IDE
Optional Step: to Setup RabbitMQ On Local Setup
- Install Docker. Follow the Docker Documentation for download and install docker.
- Pull RabbitMQ docker image from Docker Hub. Follow the RabbitMQ Docker Image. Make sure to use management version (Ex :- 3.12.4-management).
- Run the docker image of rabbitmq and start the container.
docker run --rm -it -p 15672:15672 -p 5672:5672 rabbitmq:3.12.4-management
After run the RabbitMQ through Docker, we can access the RabbitMQ console using http://localhost:15672. Default username and password for the console is guest.
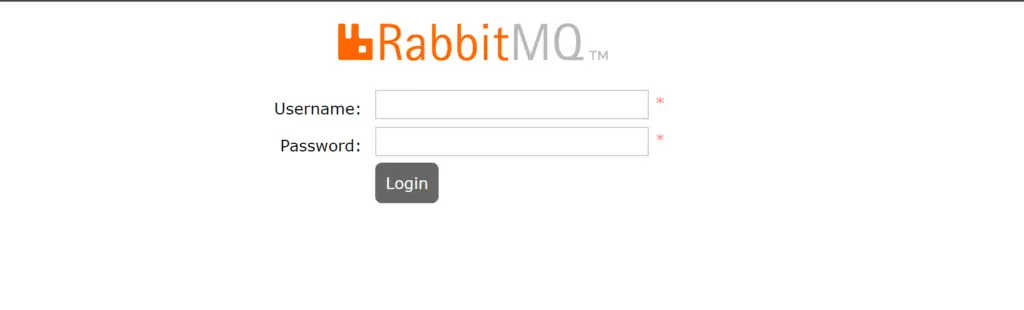
RabbitMQ Login Page
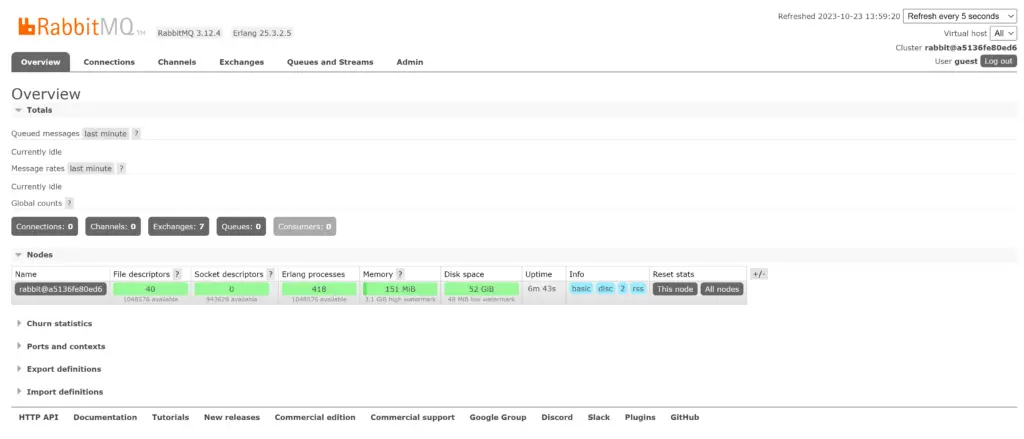
RabbitMQ Overview Page
Adding Required Dependencies
For this tutorial I’ll use spring initializer to generate a spring boot project with all the dependencies I need for this tutorial. If you are really new to Spring Boot, Please follow our article on How to Create a Spring Boot Project.
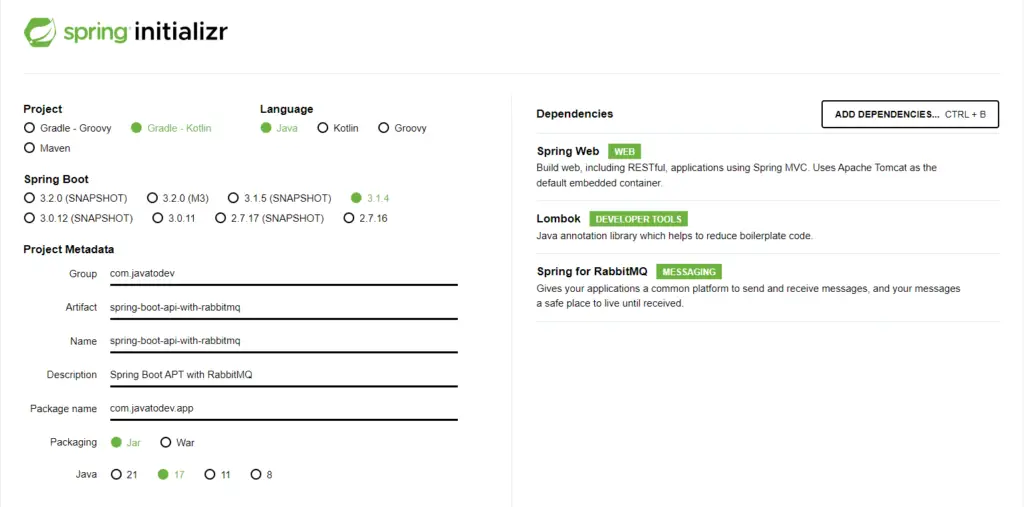
Generating spring boot application with spring initializer
Once you created the project and open it from IntellijIdea, all the dependencies are downloaded and we can see the dependencies in build.gradle file as mentioned below.
plugins {
	id 'java'
	id 'org.springframework.boot' version '3.1.3'
	id 'io.spring.dependency-management' version '1.1.3'
}

group = 'java.com.javatodev.app'
version = '1.0.0-RELEASE'

java {
	sourceCompatibility = '17'
}

configurations {
	compileOnly {
		extendsFrom annotationProcessor
	}
}

repositories {
	mavenCentral()
}

dependencies {
	implementation 'org.springframework.boot:spring-boot-starter-actuator'
	implementation 'org.springframework.boot:spring-boot-starter-amqp'
	implementation 'org.springframework.boot:spring-boot-starter-web'
	compileOnly 'org.projectlombok:lombok'
	annotationProcessor 'org.projectlombok:lombok'
	testImplementation 'org.springframework.boot:spring-boot-starter-test'
	testImplementation 'org.springframework.amqp:spring-rabbit-test'
}

tasks.named('test') {
	useJUnitPlatform()
}
Developing the API with Publishers
We have a spring boot project with all the dependencies which are need to access the RabbitMQ. Let’s start the development.
Configure Application Properties
In application.properties or application.yml file, we define the properties which are need for the API. In hear we define rabbitmq host, port, username and password. And also define the rabbitmq queue names, exchange key and routing key names.
spring.rabbitmq.host = localhost
spring.rabbitmq.port = 5672
spring.rabbitmq.username = guest
spring.rabbitmq.password = guest

rabbitmq.queue.name = message-queue
rabbitmq.queue.json.name = message-queue-json
rabbitmq.exchange.name = message-queue-exchange
rabbitmq.routing.key = message-queue-routing-key
rabbitmq.routing.json.key = message-queue-routing-json-key
You can change the server port with defining it in the property file.
Then we need to introduce these application properties to spring boot application via RabbitMQ configuration class as below.
package com.javatodev.app.configuration;

import org.springframework.amqp.core.*;
import org.springframework.amqp.rabbit.connection.ConnectionFactory;
import org.springframework.amqp.rabbit.core.RabbitTemplate;
import org.springframework.amqp.support.converter.Jackson2JsonMessageConverter;
import org.springframework.amqp.support.converter.MessageConverter;
import org.springframework.beans.factory.annotation.Value;
import org.springframework.context.annotation.Bean;
import org.springframework.context.annotation.Configuration;

@Configuration
public class RabbitMQConfig {

    @Value("${rabbitmq.queue.name}")
    private String queue;

    @Value("${rabbitmq.queue.json.name}")
    private String jsonQueue;

    @Value("${rabbitmq.exchange.name}")
    private String exchange;

    @Value("${rabbitmq.routing.key}")
    private String routingKey;

    @Value("${rabbitmq.routing.json.key}")
    private String routingJsonKey;


    @Bean
    public Queue queue(){
        return new Queue(queue);
    }


    @Bean
    public Queue jsonQueue(){
        return new Queue(jsonQueue);
    }

    @Bean
    public TopicExchange exchange(){
        return new TopicExchange(exchange);
    }


    @Bean
    public Binding binding(){
        return BindingBuilder.bind(queue())
                .to(exchange())
                .with(routingKey);
    }

    @Bean
    public Binding jsonBinding(){
        return BindingBuilder.bind(jsonQueue())
                .to(exchange())
                .with(routingJsonKey);
    }

    @Bean
    public MessageConverter messageConverter(){
        return new Jackson2JsonMessageConverter();
    }


    @Bean
    public AmqpTemplate amqpTemplate(ConnectionFactory connectionFactory){
        RabbitTemplate rabbitTemplate = new RabbitTemplate(connectionFactory);
        rabbitTemplate.setMessageConverter(messageConverter());
        return rabbitTemplate;
    }
}
In here, we use two binding beans for bind the queues to exchange with routing keys. There are two type of bindings are used in this API with binding queue with simple message and binding queue with Json message.
Another bean is used for convert the message from Jackson to Json and AmqpTemplate bean is used as a template for convert the Jackson messsage.
Define Producer Classes with Simple Message and Json Message
In here we used two procedure classes for produce simple message and json message to RabbitMQ queues.
package com.javatodev.app.publisher;

import lombok.extern.slf4j.Slf4j;
import org.springframework.amqp.rabbit.core.RabbitTemplate;
import org.springframework.beans.factory.annotation.Value;
import org.springframework.stereotype.Service;

@Slf4j
@Service
public class RabbitMQProducer {

    @Value("${rabbitmq.exchange.name}")
    private String exchange;

    @Value("${rabbitmq.routing.key}")
    private String routingKey;

    private RabbitTemplate rabbitTemplate;

    public RabbitMQProducer(RabbitTemplate rabbitTemplate) {
        this.rabbitTemplate = rabbitTemplate;
    }

    public void sendMessage(String message){
        log.info(String.format("Message sent -> %s",message));
        rabbitTemplate.convertAndSend(exchange,routingKey,message);
    }
}
Before define the Json message produce class, we need to define User DTO class.
package com.javatodev.app.dto;

import lombok.Data;

@Data
public class User {

    private int id;
    private String firstName;
    private String lastName;
}
After the DTO class, we can define the producer class with Json message.
package com.javatodev.app.publisher;

import lombok.extern.slf4j.Slf4j;
import org.springframework.amqp.rabbit.core.RabbitTemplate;
import org.springframework.beans.factory.annotation.Value;
import org.springframework.stereotype.Service;

import com.javatodev.app.dto.User;

@Slf4j
@Service
public class RabbitMQJsonProducer {

    @Value("${rabbitmq.exchange.name}")
    private String exchange;

    @Value("${rabbitmq.routing.json.key}")
    private String routingJsonKey;

    private RabbitTemplate rabbitTemplate;

    public RabbitMQJsonProducer(RabbitTemplate rabbitTemplate) {
        this.rabbitTemplate = rabbitTemplate;
    }

    public void sendJsonMessage(User user){
        log.info(String.format("Json message sent -> %s",user.toString()));
        rabbitTemplate.convertAndSend(exchange,routingJsonKey,user);
    }
}
Define the Controller Class
Then we need to define the controller class to route the two RabbitMQ producers for publish the messages to queue.
There is GET method for publish simple message and POST method for publish Json message to the queue.
package com.javatodev.app.controller;

import org.springframework.http.ResponseEntity;
import org.springframework.web.bind.annotation.*;

import com.javatodev.app.dto.User;
import com.javatodev.app.publisher.RabbitMQJsonProducer;
import com.javatodev.app.publisher.RabbitMQProducer;

@RestController
@RequestMapping("/api/v1")
public class MessageController {

    private RabbitMQProducer rabbitMQProducer;

    private RabbitMQJsonProducer rabbitMQJsonProducer;

    public MessageController(RabbitMQProducer rabbitMQProducer, RabbitMQJsonProducer rabbitMQJsonProducer) {
        this.rabbitMQProducer = rabbitMQProducer;
        this.rabbitMQJsonProducer = rabbitMQJsonProducer;
    }


    @GetMapping("/publish")
    public ResponseEntity<String> sendMessage(@RequestParam("message") String message){
        rabbitMQProducer.sendMessage(message);
        return ResponseEntity.ok("Message sent to RabbitMQ.");
    }


    @PostMapping("/publish")
    public ResponseEntity<String> sendJsonMessage(@RequestBody User user){
        rabbitMQJsonProducer.sendJsonMessage(user);
        return ResponseEntity.ok("Json message sent to RabbitMQ.");
    }
}
Deploying and Testing the API with Publishers
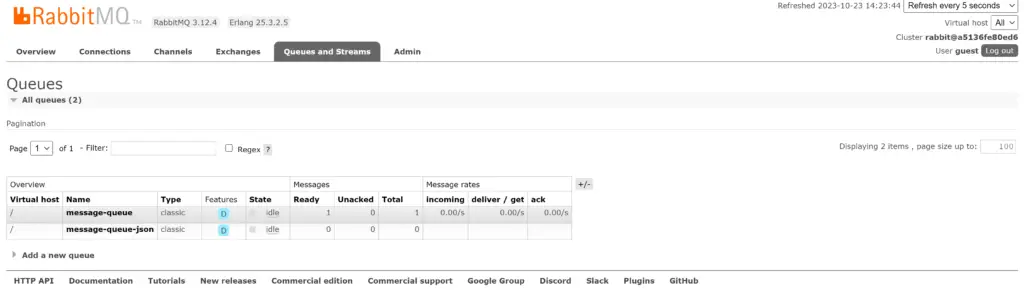
When we build and start our API, we can see the binding with our API and RabbitMQ in console. Also we can see the queues which are registered with RabbitMQ.
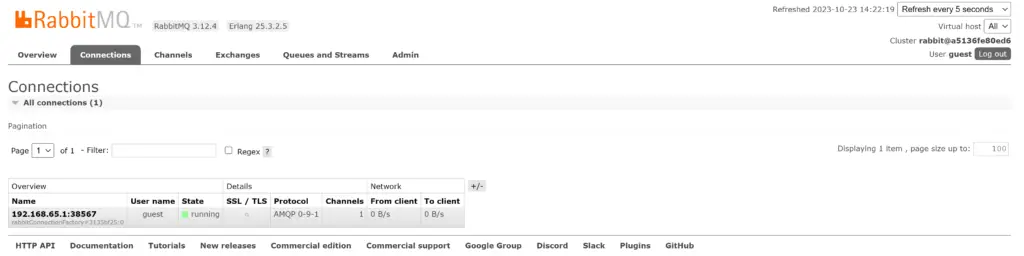
RabbitMQ Dashboard
RabbitMQ Dashboard
Publish Simple Message
We can publish a simple message to the message-queue from below mentioned GET URL.
http://<IP:PORT>/api/v1/publish?message=hello world
Once we publish the message from GET method from postman, we can see the response message. Important thing is we can see the message statistics and message in our queue through RabbitMQ console.
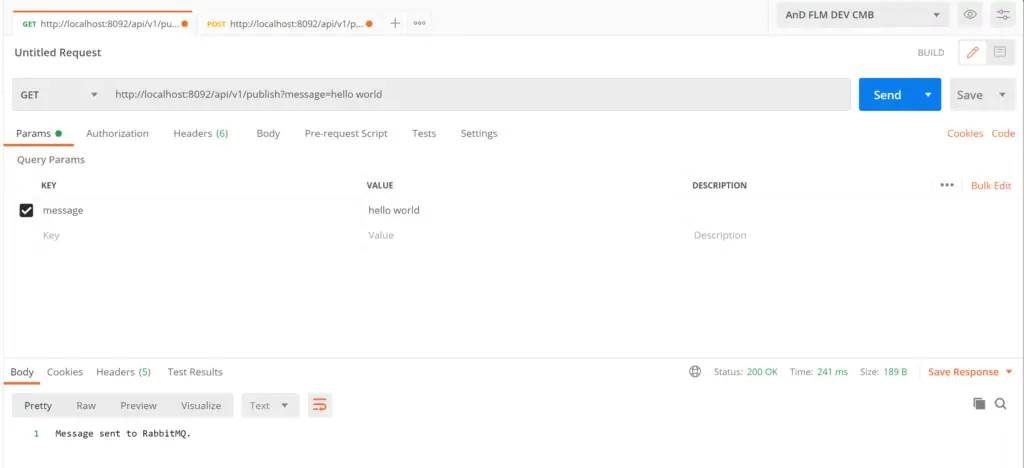
Postman API Testings
INFO 15868 --- [nio-8092-exec-2] c.j.app.publisher.RabbitMQProducer : Message sent -> hello world
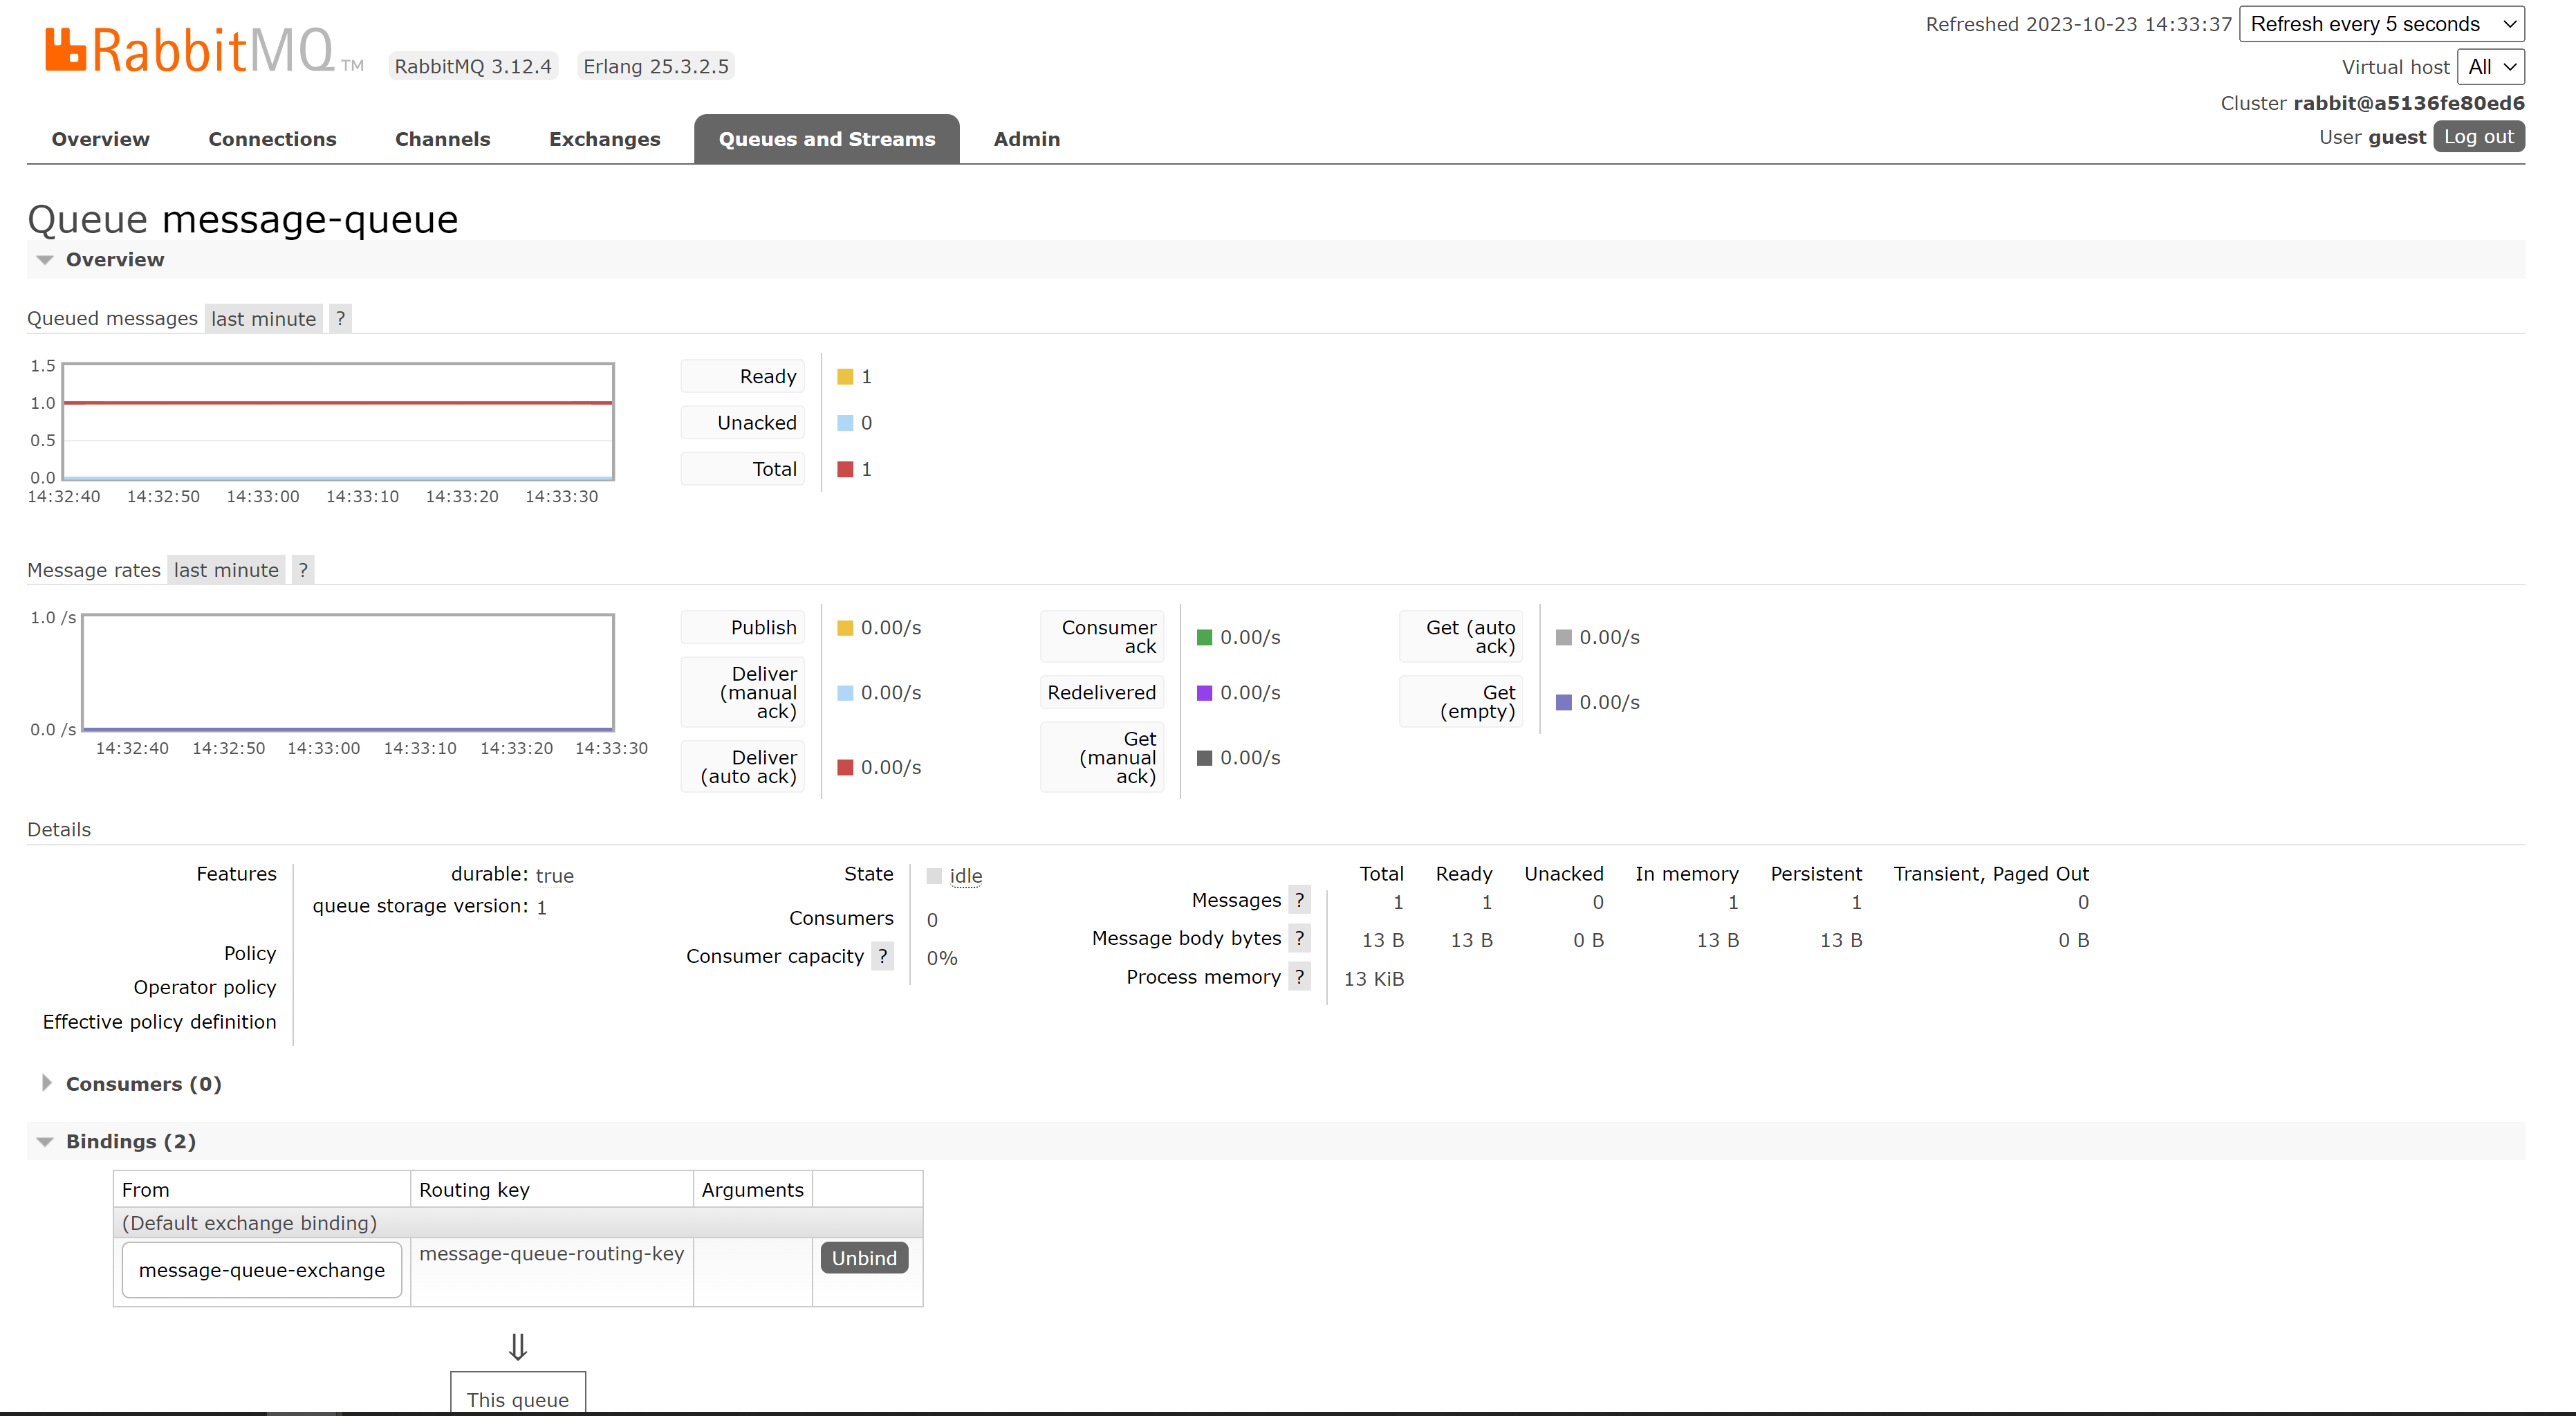
RabbitMQ message-queue Queue Page
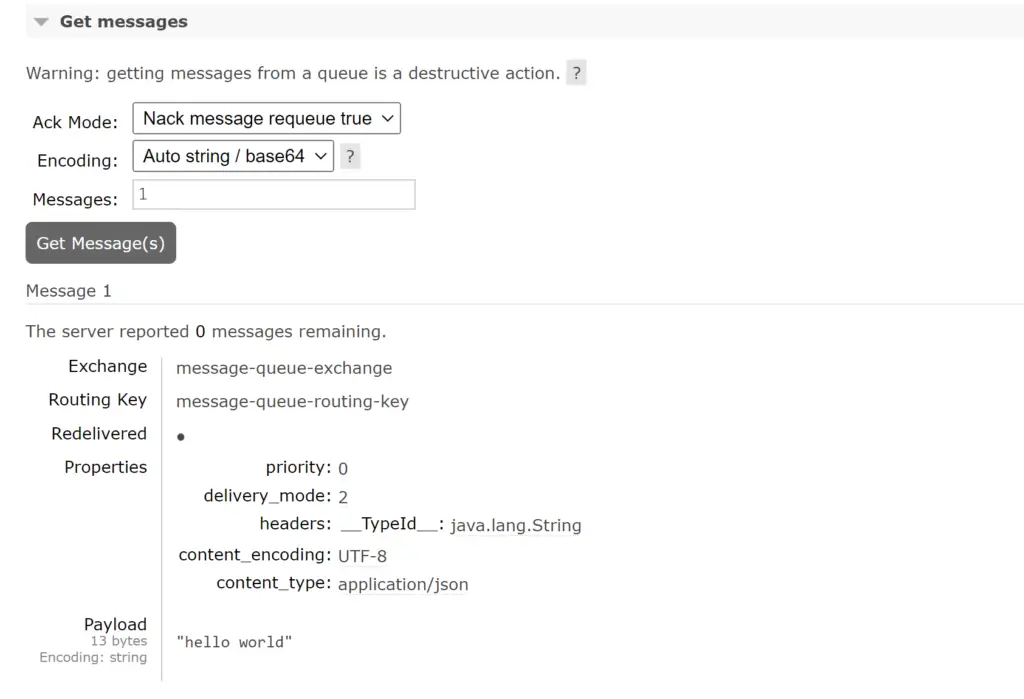
Get Messages from RabbitMQ Dashboard
Publish JSON Message
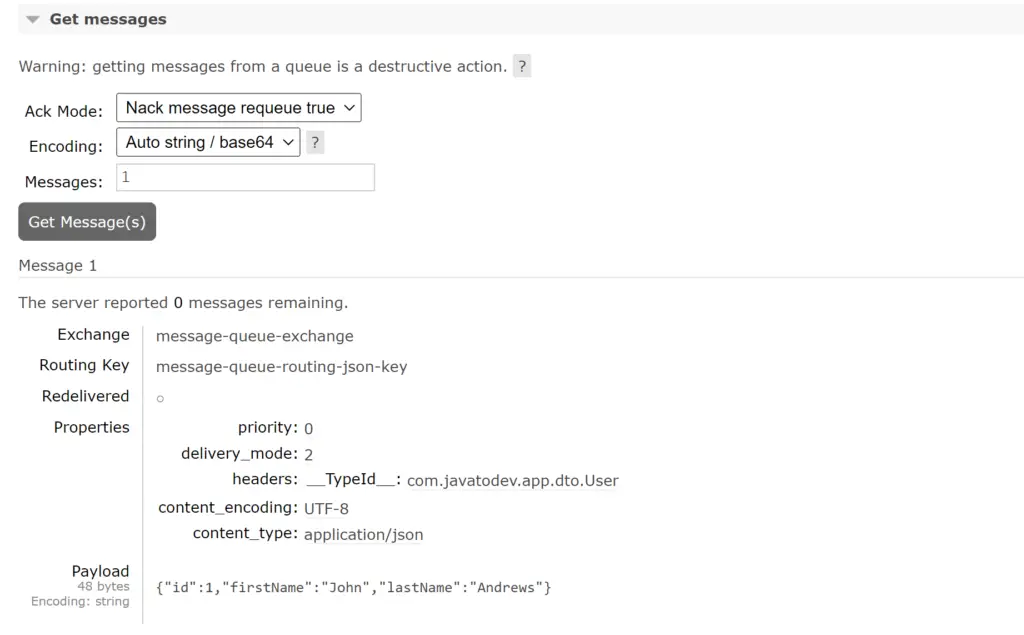
We can publish a json message to the message-queue-json from below mentioned POST URL.
http://<IP:PORT>/api/v1/publish
Once we publish the message from POST method from postman, we can see the response message. Important thing is we can see the message statistics and message in our queue through RabbitMQ console.
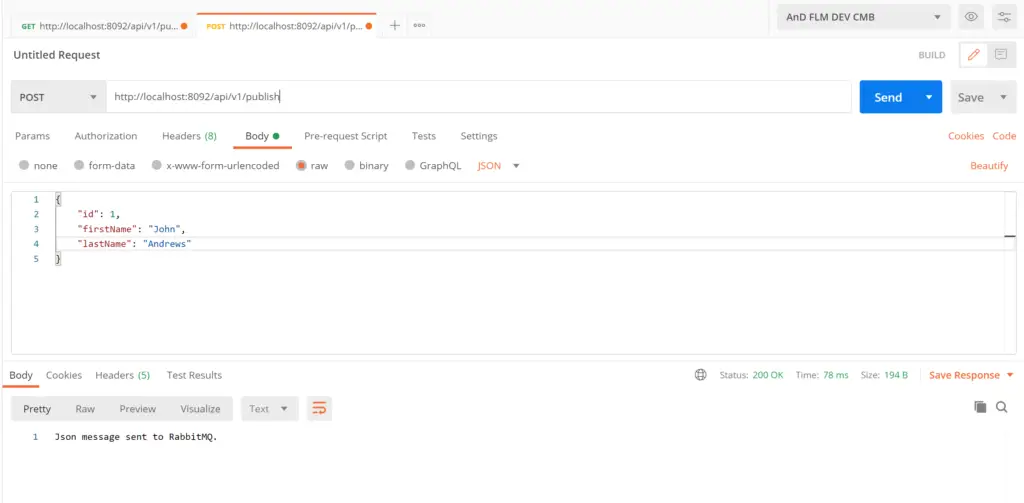
Postman API Testings
INFO 15868 --- [nio-8092-exec-5] c.j.app.publisher.RabbitMQJsonProducer : Json message sent -> User(id=1, firstName=John, lastName=Andrews)

Updating the API with Adding Consumers
For consume the message from RabbitMQ, we used separate consumer classes for consume simple message and json message. We used same properties which are configured in application.properties file. We can use the @RabbitListener annotation for mentioned the method is a listener.
Consumer class for simple message
package com.javatodev.app.consumer;

import lombok.extern.slf4j.Slf4j;
import org.springframework.amqp.rabbit.annotation.RabbitListener;
import org.springframework.stereotype.Service;

@Slf4j
@Service
public class RabbitMQConsumer {


    @RabbitListener(queues = {"${rabbitmq.queue.name}"})
    public void consume(String message){
        log.info(String.format("Received message -> %s", message));
    }
}
Consumer class for json message
package com.javatodev.app.consumer;

import com.javatodev.app.dto.User;
import lombok.extern.slf4j.Slf4j;
import org.springframework.amqp.rabbit.annotation.RabbitListener;
import org.springframework.stereotype.Service;

@Slf4j
@Service
public class RabbitMQJsonConsumer {

    @RabbitListener(queues = {"${rabbitmq.queue.json.name}"})
    public void consumeJsonMessage(User user){
        log.info(String.format("Received json message -> %s", user.toString()));
    }
}
Deploying and Testing the API with Consumers
Publish and Consume Simple Message
We can publish a simple message to the message-queue from below mentioned GET URL.
http://<IP:PORT>/api/v1/publish?message=hello world
Once we publish the message from GET method from postman, we can see the response message.
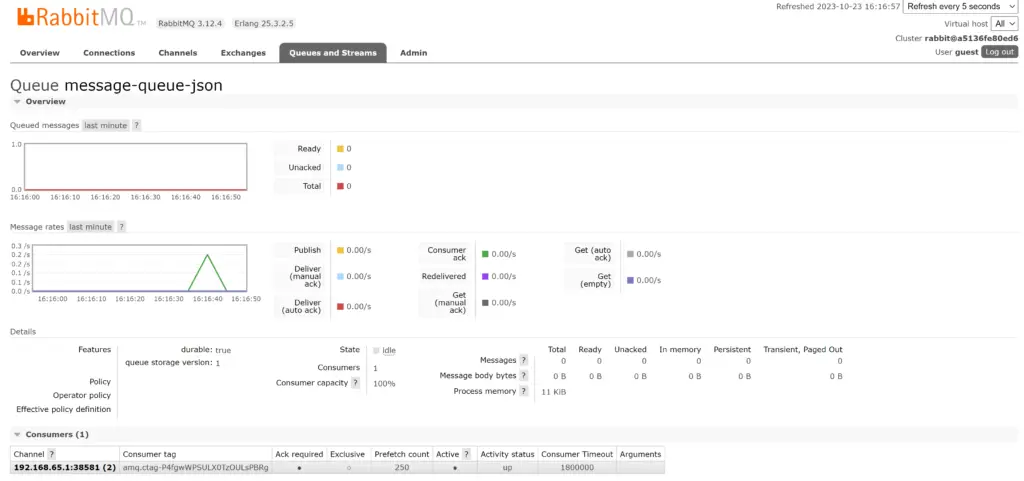
We can see queue statistics from RabbitMQ console and publish message is disappear because it is retrieve by consumer.
INFO 25692 --- [nio-8092-exec-5] c.j.app.publisher.RabbitMQProducer       : Message sent -> hello world
INFO 25692 --- [ntContainer#0-1] c.j.app.consumer.RabbitMQConsumer        : Received message -> hello world

Publish and Consume JSON Message
We can publish a json message to the message-queue-json from below mentioned POST URL.
http://<IP:PORT>/api/v1/publish
Once we publish the message from POST method from postman, we can see the response message.
We can see queue statistics from RabbitMQ console and publish message is disappear because it is retrieve by consumer.
INFO 25692 --- [nio-8092-exec-8] c.j.app.publisher.RabbitMQJsonProducer   : Json message sent -> User(id=1, firstName=John, lastName=Andrews)
NFO 25692 --- [ntContainer#1-1] c.j.app.consumer.RabbitMQJsonConsumer    : Received json message -> User(id=1, firstName=John, lastName=Andrews)
Conclusion
Thanks for reading our latest article on Spring Boot REST API with RabbitMQ with practical usage.
If you are looking for spring boot practical application development tutorials, just check our article series.
You can get the source code for this tutorial from our GitHub repository.