How to Setup HashiCorp Vault With Spring Boot Application
-
 Chinthaka Dinadasa
 - 14 Dec, 2022

Assume we need to setup secure storage for our application tokens, passwords or any other secret and sensitive data.
HashiCorp vault allows us to setup secure access to those sensitive data with reduce the risk of breaches and data exposure with identity-based security automation and encryption-as-a-service.
In this article we are going to learn how we can setup HashiCorp vault with spring boot application to store and retrieve application secrets and few other sensitive configuration values in secure way.
Setup HashiCorp Vault
Here we are going to use hashicorp vault local installation, and you are free to choose between local and cloud setup.
Please refer installation guide to setup vault locally then start the vault using following command.
use following command, If you need to set custom root token on starting server.
$ vault server -dev --dev-root-token-id="18456350-7b89-11ed-85e9-a5830358e351"
or else you can just start the DEV server, then use auto generated token or generate new token on later stage as well.
$ vault server -dev
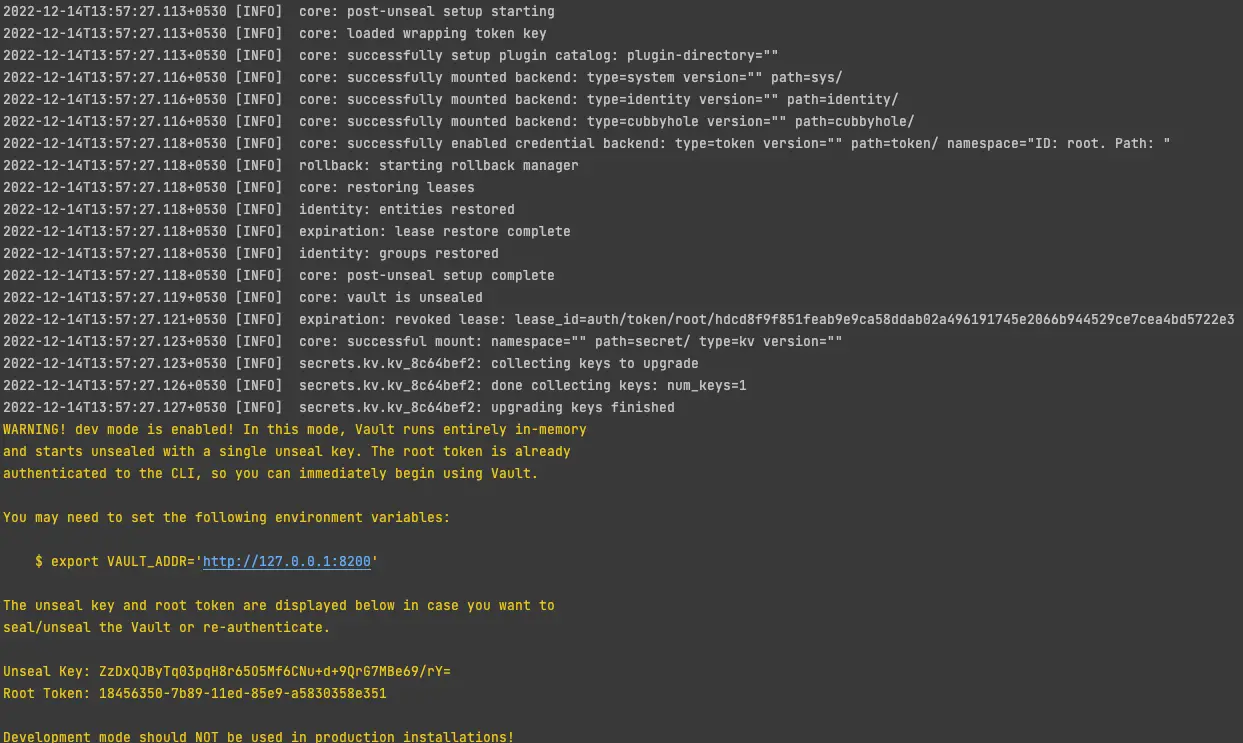
Sample output on vault startup through terminal
After vault started we can access vault web UI with http://127.0.0.1:8200/ or else you can use vault with basic commands through terminal. We can use the root token we have given earlier or auto generated token on startup.
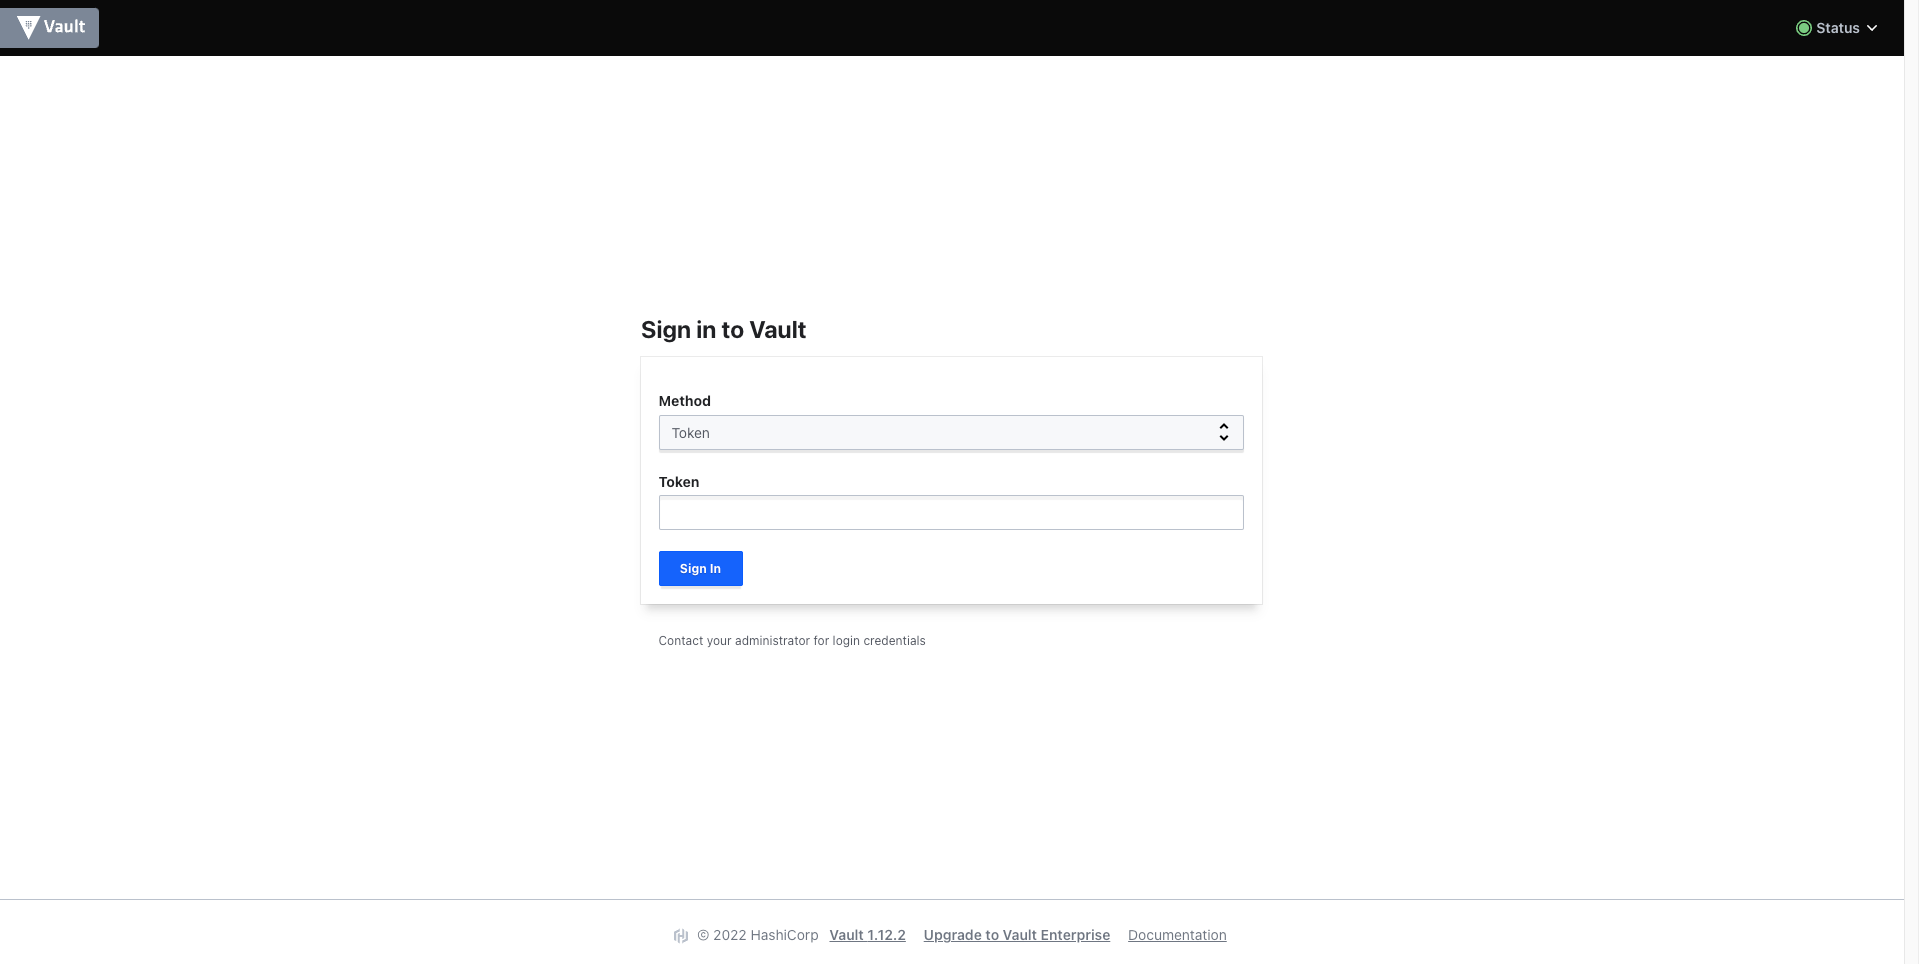
HashiCorp vault web UI - Login Page
Creating Secrets on Vault
In this application we are going to read 3 values from vault, which will help to start the spring boot application.
- spring.datasource.database
- spring.datasource.username
- spring.datasource.password
We can use both terminal and vault UI to create these secrets.
- Better if you can set VAULT_ADDR before executing vault commands on the terminal using following command.
$ export VAULT_ADDR="http://127.0.0.1:8200"
Then create above secrets with following command.
$ vault kv put secret/javatodev_core_api spring.datasource.database=javatodev_application_db spring.datasource.password=password spring.datasource.username=root app.config.auth.token=5bd8b84a-7b9a-11ed-a1eb-0242ac120002 app.config.auth.username=actuator
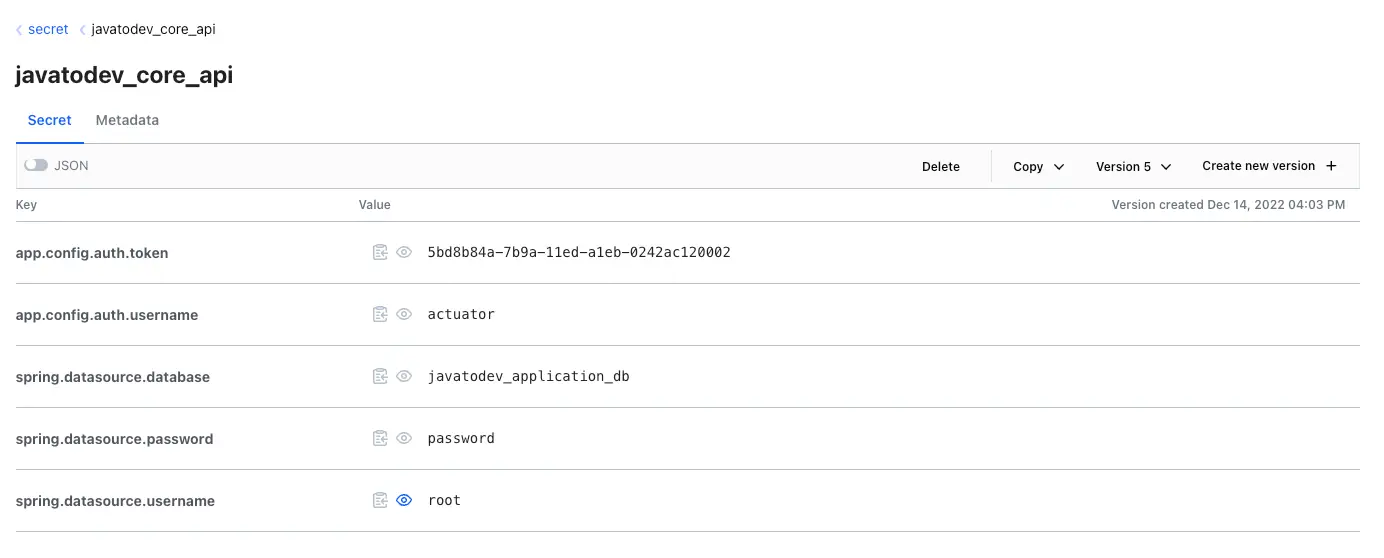
secrets created on Hashicorp vault UI
Spring Boot Application With Vault Configuration
Now we can consume secrets we have created on vault on earlier stages. First we have to create the spring boot application with following dependencies.
- Vault Configuration - Provides client-side support for externalized configuration in a distributed system. Using HashiCorp’s Vault you have a central place to manage external secret properties for applications across all environments.
- Spring Web - Build web, including RESTful, applications using Spring MVC. Uses Apache Tomcat as the default embedded container.
- MySQL Driver - Optional
- Spring Data JPA - Optional
- Lombok - Optional
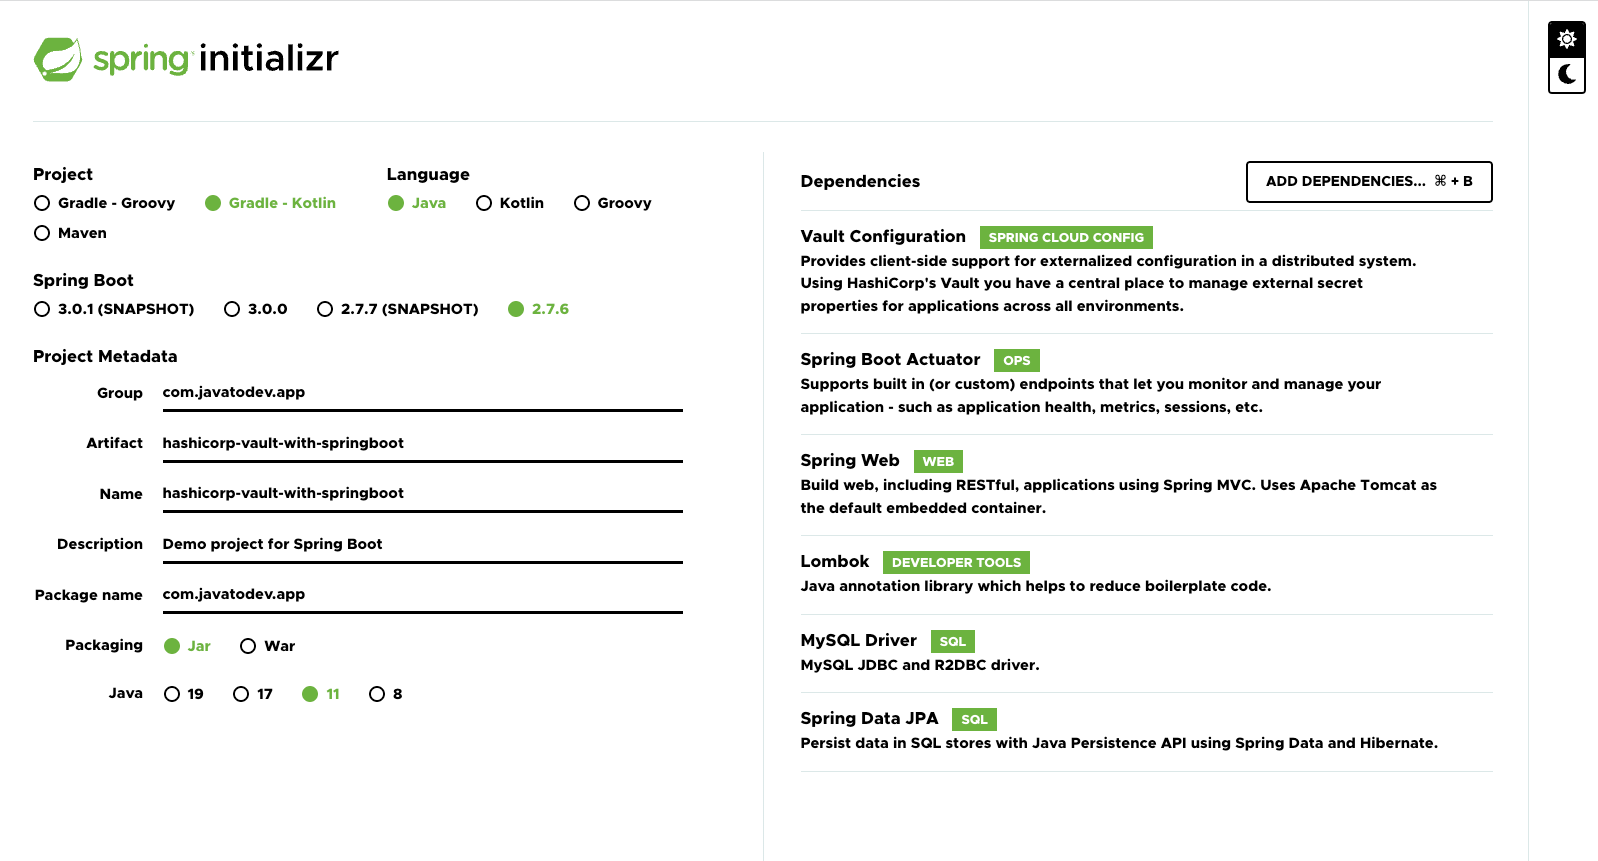
Spring boot application with vault configuration library
- If you are new to spring boot API developments, you can refer to our article on How to Create a Spring Boot Project
Application Configurations
Now we can connect our spring boot application with hashicorp vault instance which is started on our local environment.
Add the following in to the application.properties file.
- spring.application.name will be used as the identifier for the configurations which we have stored on hashicorp.
- Here spring.datasource.database will be read from hashicorp vault and set as param to the spring.datasource.url.
- spring.datasource.username and spring.datasource.password will be reading from hashicorp vault and directly inject in to the application context.
spring.application.name=javatodev_core_api
spring.cloud.vault.kv.enabled=true
spring.cloud.vault.authentication=TOKEN
spring.cloud.vault.token=18456350-7b89-11ed-85e9-a5830358e351
spring.cloud.vault.scheme=http
spring.cloud.vault.host=127.0.0.1
spring.cloud.vault.port=8200
spring.config.import: vault://
spring.datasource.url=jdbc:mysql://127.0.0.1:3306/${spring.datasource.database}
Load Properties With @ConfigurationProperties to Spring Boot
There are 2 additional configurations that we have added with vault. We are going to read those configs using @ConfigurationProperties.
package com.javatodev.app.config;
import org.springframework.boot.context.properties.ConfigurationProperties;
import org.springframework.context.annotation.Configuration;
import lombok.Getter;
import lombok.Setter;
@Getter
@Setter
@Configuration
@ConfigurationProperties("app.config.auth")
public class AppConfiguration {
    private String username;
    private String token;
}
Then we can implement service class where we can read configurations using AppConfiguration.
package com.javatodev.app.service;
import com.javatodev.app.config.AppConfiguration;
import org.springframework.beans.factory.annotation.Value;
import org.springframework.stereotype.Service;
import javax.annotation.PostConstruct;
import lombok.RequiredArgsConstructor;
import lombok.extern.slf4j.Slf4j;
@Slf4j
@Service
@RequiredArgsConstructorpublic
class AppService {
    private final AppConfiguration appConfiguration;
    @PostConstruct
    public void readConfigs() {
        log.info("Reading configuration {} - {}", appConfiguration.getToken(), appConfiguration.getUsername());
    }
}
- Spring Cloud Vault uses VaultOperations to interact with Vault. Properties from Vault get mapped to AppConfiguration for type-safe access.
Spring Boot Profile Support
We can create multiple variations of the vault secrets under same name. This allows us to enable different configurations depending on spring boot active profile.
Here we are going to setup DEV profile and we can create all the necessary secrets using following command.
$ vault kv put secret/javatodev_core_api/dev spring.datasource.database=javatodev_application_dev_db spring.datasource.password=password spring.datasource.username=root app.config.auth.token=34ef65f0-7b9d-11ed-a1eb-0242ac120002 app.config.auth.username=dev_user
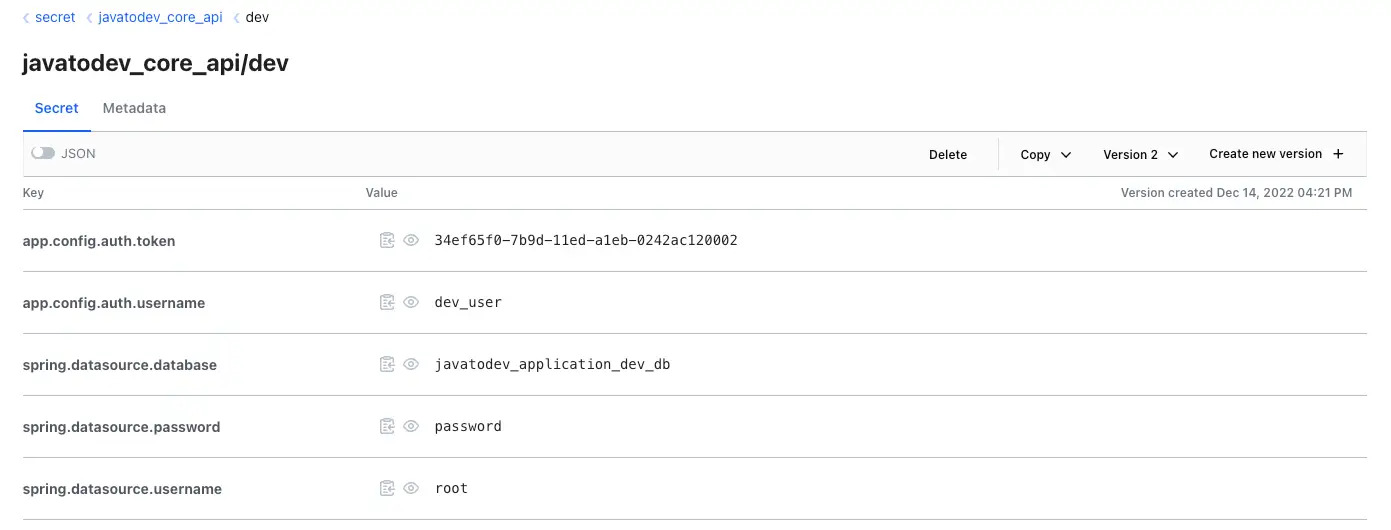
dev Profile related configurations on hashicorp vault
Build and Startup Application
If you use Gradle, you can run the application by using ./gradlew bootRun. Alternatively, you can build the JAR file by using ./gradlew build and then run the JAR file, as follows:
$ java -jar build/libs/hashicorp-vault-springboot-0.0.1-SNAPSHOT.jar
As our application service use @PostConstruct following output should written on application startup.

Spring boot application log on startup
$ java -jar build/libs/hashicorp-vault-springboot-0.0.1-SNAPSHOT.jar --spring.profiles.active=dev

Spring boot application log on startup with DEV profile
Conclusion
In this article we have discussed how to setup HashiCorp vault with Spring Boot application.
The implementation of all these examples and code snippets can be found in our Github repository.
Happy coding.