How to Deploy Spring Boot Application On AWS Elastic Beanstalk
-
 Chinthaka Dinadasa
 - 13 Jan, 2023
AWS Elastic Beanstalk is a fully managed service that makes it easy to deploy, run, and scale web applications and services in the AWS Cloud. When deploying Spring Boot applications, AWS Elastic Beanstalk is an excellent choice as it provides a simple and cost-effective way to run and scale Java web applications without worrying about the underlying infrastructure.
The Elastic Beanstalk service is fully integrated with the Spring Boot framework, which allows you to deploy Spring Boot applications with minimal configuration easily.
Spring Boot Application We Are Going To Deploy
Here, I’ve developed minimal REST API with Spring Boot, Java 17, JPA, and H2 In-memory database. You can clone it from this repository.
This API has a single endpoint where it reads the countries list from the H2 database and is exposed with the following URL.
or else feel free to use any spring boot application to that you have access.
Deployment Flow
Let’s start the deployment of our Spring Boot application on AWS elastic beanstalk and expose that through public URL.
Using Elastic Beanstalk CLI
In this tutorial, I’m going to use Elastic Beanstalk CLI which allows us to simply access the elastic beanstalk product on AWS and create any kind of environment we like.
Also there is another way we can use AWS dashboard to achieve the same target.
You can refer this official document in order to setup EB CLI on your development machine.
Setting Up Application On Elastic Beanstalk
First we should create a new application and deployment environment on elastic beanstalk. We can achieve that with executing following command on project root.
$ eb init
then choose preferred AWS region and application name to create the deployment environment.
Here I’ve used us-west-2 : US West (Oregon) for demonstration purposes.
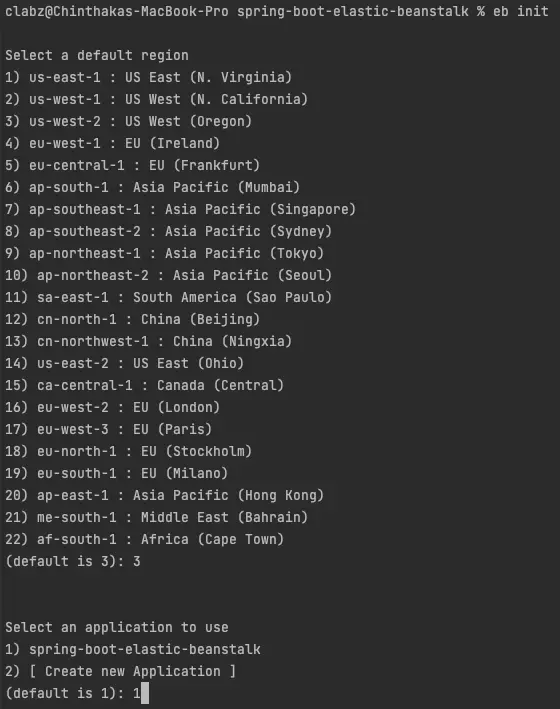
Initializing Elastic Beanstalk Environment to Deploy Spring Boot Application
After completing this step you should asked to choose the platform, Here it should be Java and choose the java version which matches with your application, For me it is Java - Corretto 17 running on 64bit Amazon Linux 2.
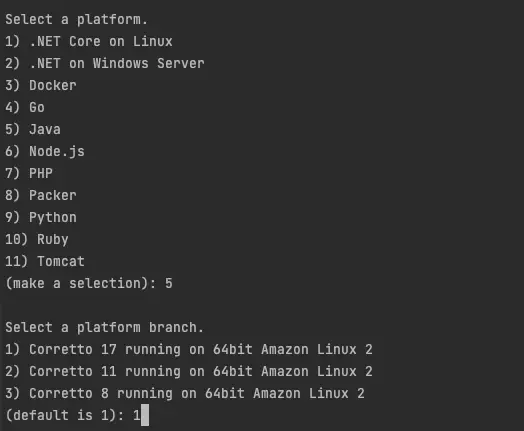
Selecting platform and deployment version
Finally there will be asked to setup CodeCommit and setup SSH access to the EC2 instances that this setup will creates. But for the moment I’m not going to setup those.
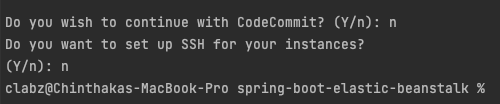
Code commit and SSH access setup elastic beanstalk
So now we should have elastic beanstalk config.yml created on project root with config as below.
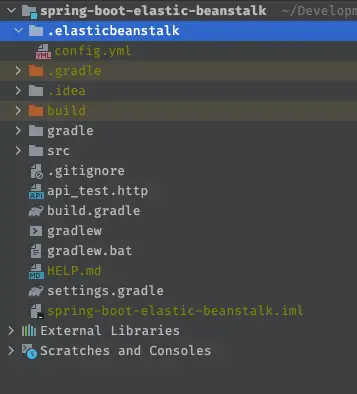
Project structure after creating EB configuration
branch-defaults:
  main:
    environment: null
global:
  application_name: spring-boot-elastic-beanstalk
  branch: null
  default_ec2_keyname: null
  default_platform: Corretto 17 running on 64bit Amazon Linux 2
  default_region: us-west-2
  include_git_submodules: true
  instance_profile: null
  platform_name: null
  platform_version: null
  profile: null
  repository: null
  sc: git
  workspace_type: Application
Configure JAR File For Elastic Beanstalk Deployment
By default, EB CLI use git history and create zip file to with latest application code when deploying. But that will not work with spring boot application since it should be deploy using JAR file build on application build folders.
We need to show that specific JAR build in order to deploy on elastic beanstalk. We can achieve that with adding following into the .elasticbeanstalk/config.yml.
Here I’m using Gradle for application build, it creates the application JAR build on /build/libs/ folder on project root.
deploy:
  artifact: build/libs/spring-boot-elastic-beanstalk-0.0.1-SNAPSHOT.jar
Setting Up Deployoment Environment and Process Initial Deployment
Now, we can deploy our JAR build on EB environment, with following command,
$ eb create
choose environment name, DNS name prefix which will used to expose our API with domain name and load balancer type.
Here I’ve used application load balancer and skipped creating spot instance fleet.
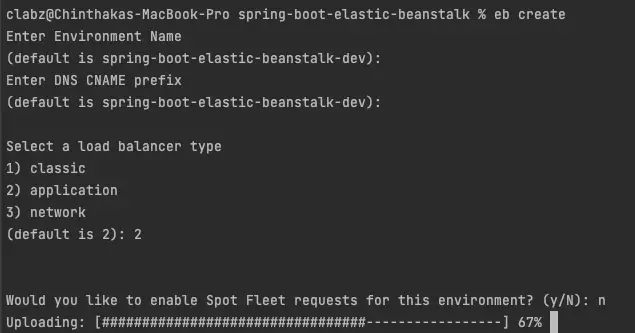
Elastic Beanstalk Environment Creation
Here you should see EB CLI started to deploy your JAR built on AWS, and it should be started to upload with above command.
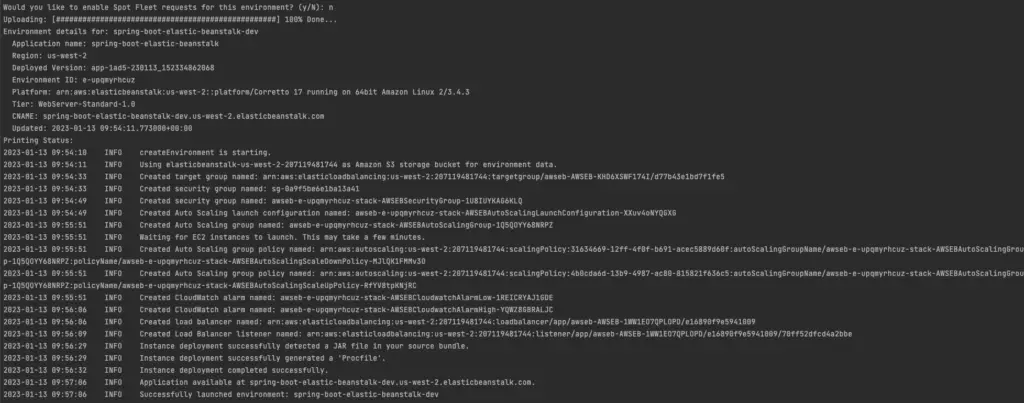
Output on Deploying Spring Boot Application on Elastic Beanstalk
Setting Application Ports To Expose With Public URL
Since we are using default port with spring boot application, It runs on port 8080. But elastic beanstalk uses nginx internally and it routes public domain entry into port 5000. Hence we have to setup our application to run with port 5000 with following command.
$ eb setenv SERVER_PORT=5000
Now our deployment should be done, and we could access our API through the public URL published on the elastic beanstalk dashboard.

Environments on Elastic Beanstalk Dashboard
Access the API using public URL and /api/v1/countries and it should return following JSON reponse.

Benefits Of Using Elastic Beanstalk
One of the key benefits of using AWS Elastic Beanstalk for Spring Boot applications is that it abstracts away the underlying infrastructure so you don’t have to worry about provisioning and managing servers.

EC2 Instances created automatically on Elastic Beanstalk Environment Setup.
The service automatically provisions and scales the infrastructure to match the number of requests and the amount of traffic your application receives, taking care of all the underlying infrastructure for you. This allows you to focus on developing and deploying your application without worrying about the operational aspect of running it. Additionally, with the simple and cost-effective pricing model, it’s a great option for deploying and running Spring Boot applications on the cloud.

Auto Scaling Groups created automatically

Load balancers provisioned on environment creation automatically
Conclusions
In this article we have discussed how we can deploy a spring boot application on AWS elastic beanstalk on a practical scenario.
The implementation of all these examples and code snippets can be found in our Github repository.
Happy coding.
Recommended Reading
- How to Setup HashiCorp Vault With Spring Boot Application
- Task Scheduling on Spring Boot Using @Scheduler
- How to Use Amazon SQS With Spring Boot
- Multiple Datasources With Spring Boot Data JPA
- How To Handle Multiple Message Properties In Spring Boot
- Spring Boot JWT Authentication using Spring Security