How to Develop Vue JS CRUD with Vuetify, Axios, Spring Boot REST API
-
 Chinthaka Dinadasa
 - 03 Dec, 2020

In this article, I’ll explain how we can develop the Vue JS frontend by consuming a REST API covering CRUD operations with multiple UI components.
For this tutorial, I’m going to use the library REST API which I’ve developed for,
If you are really new to Spring boot and REST API development, better go through above tutorial, or else just download the shared code from GitHub in that article.
Additionally, the same API has been developed using MongoDB and DynamoDB,
You can use any API from the above articles to work with this frontend.
Additionally, this same CRUD example has been developed using Angular 10,
Angular 10 CRUD with Spring Boot REST API
Technologies I’m going to use in Frontend,
- Vue 3.4.1
- Vue Router
- Vuetify 2.2.11
- Axios 0.21.0
This is what we are going to develop in this article,

Vue JS 3 Crud Example with REST API
Up and Running Backend REST API
Here as I mentioned above, I’ll use the API we have developed in our previous tutorial, First download the source codes for that Spring boot REST API from here.
$ git clone https://github.com/javatodev/tutorials.git .
If you are really new to Spring Boot, You can get an idea from our article on How to Create a Spring Boot Project.
After downloading the project, change the spring-boot-rest-api-mysql/src/main/resources/application.properties to connect with the preferred MySQL instance on your side.
spring.datasource.url=jdbc:mysql://127.0.0.1:3306/java_to_dev_api_mysql
spring.datasource.username=root
spring.datasource.password=password
spring.jpa.hibernate.ddl-auto=update
spring.jpa.show-sql=true
Change these properties accordingly to access the mysql instance on your machine.
Then start the application using following command,
$ ./gradlew bootRun
Then you can validate the API status just accessing following URL from your browser or using CURL in the command line,
http://localhost:8080/api/library/book
It should return an empty list or list of books if data is available on your database, after being correctly up and running.
$ curl http://localhost:8080/api/library/book
[{"id":22,"name":"Sherlock Holmes","isbn":"48973274342343242","author":{"id":27,"firstName":"Sir Arthur","lastName":"Conan Doille"}}]
Developing Vue JS Project
For this Vue JS CRUD tutorial, I’m going to use Vue CLI in order to generate the project.
If you don’t have Vue CLI installed refer this article to install it first.
After installing the vue CLI use following commands to create and configure the base project,
$ vue create vue-3-crud-with-rest-api-integration
Then select the presets you need, and for this tutorial, I’m going to use the following presets to generate this VUE JS project.
-
Check the features needed for your project:
- Router
-
Use class-style component syntax? No
-
Use Babel alongside TypeScript for auto-detected polyfills? No
-
Use history mode for the router? (Requires proper server setup for index fallback in production) No
-
Where do you prefer placing config for Babel, PostCSS, ESLint, etc.? In dedicated config files
Within few seconds your project will be created on the location you initiated above code,
Now we have our base project with basic components and default dependencies.
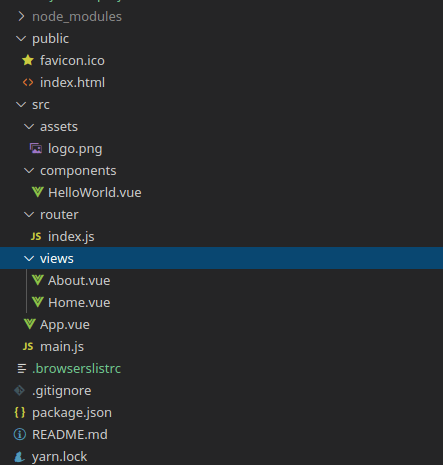
Vue JS Base Project Structure
Then,
$ cd vue-3-crud-with-rest-api-integration
and start the project with yarn or npm as below,
npm run serve
or
yarn serve
and we can see the default vue JS page after we access it on a browser, with the default URL (http://localhost:8081/). (Check the console for correct Vue JS URL).
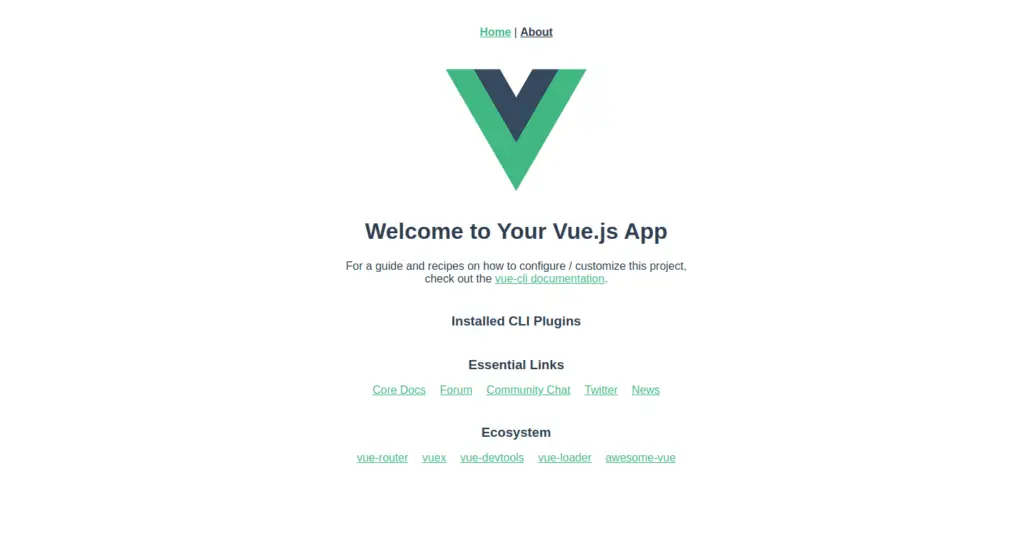
Default landing page for Vue JS Application
Adding Additional Modules
Installing and Configuring Axios in Vue
In this CRUD example, we mainly use Axios to build the communication layer between the Vue app and the backend REST API.
We can add axios module into the vue js using one of following commands,
npm install --save axios vue-axios
or
yarn add axios vue-axios
Then import axios and add configs into the src/main.js file,
import Vue from 'vue'
import App from './App.vue'
import router from './router'

//axios
import axios from 'axios'
import VueAxios from 'vue-axios'

Vue.config.productionTip = false

//axios
Vue.use(VueAxios, axios)

new Vue({
  router,
  render: function (h) { return h(App) }
}).$mount('#app')
If you are referring different Vue version, please use this documentation to setup vue-axios.
Installing and Configuring Vuetify in Vue
Vuetify is a Vue UI Library with beautifully handcrafted Material Components, which you can easily configure and use with vue js project.
Use following command to install vuetify on your project,
$ vue add vuetify
Then Choose Default as the Preset.
Start the project after the completion of installing vuetify and you could see the default vuetify landing page on base URL.
Vuetify Default Landing Page
REST API Client With Axios
We have already configured axios inside our project. So now we can use axios to build a communication layer between vue js application and REST API.
Here we have multiple API endpoints which we need to communicate in this article. Those are,
| Endpoint | HTTP Method | Description |
|---|---|---|
| /api/library/book | GET | Read all books from database. |
| /api/library/book?isbn=1919 | GET | Read book by ISBN |
| /api/library/book/:id | GET | Read book by ID |
| /api/library/book | POST | Register New Book |
| /api/library/book/:id | DELETE | Remove a book |
| /api/library/book/lend | POST | Lend a book to a member |
| /api/library/book/:id | PATCH | Update a book |
| /api/library/member | POST | Register member |
| /api/library/member | GET | Read all members. |
| /api/library/member/:id | PATCH | Update a member |
| /api/library/author | GET | Read all authors |
| /api/library/author | POST | Create author |
So we need to have an API client which we could use to communicate with our API. here we are creating separate service to handle Axios related API calls,
Let’s call it apiService and first create src/service folder and create apiService.js inside that folder and paste following content in that file.
import axios from "axios";

const apiClient = {
  async readAuthors() {
    const response = await axios.get("/author");
    return response.data;
  },
  async createAuthor(requestData) {
    const response = await axios.post("/author", requestData);
    return response.data;
  },
  async readMembers() {
    const response = await axios.get("/member");
    return response.data;
  },
  async createMember(requestData) {
    const response = await axios.post("/member", requestData);
    return response.data;
  },
  async readBooks() {
    const response = await axios.get("/book");
    return response.data;
  },
  async createBook(requestData) {
    const response = await axios.post("/book", requestData);
    return response.data;
  },
  async deleteBook(bookId) {
    const response = await axios.delete("/book/"+bookId);
    return response.data;
  },
  async lendBook(requestData) {
    console.log(requestData);
    const response = await axios.post("/book/lend", requestData);
    return response.data;
  },
  async readBook(bookId) {
    const response = await axios.get("/book/"+bookId);
    return response.data;
  },
  async updateBook(bookId, requestData) {
    const response = await axios.patch("/book/"+bookId, requestData);
    return response.data;
  }
};

export default apiClient;
here URLs defined here missing full URL which is http://localhost:8080/api/library/book . We can set it to the Axios as a configuration since it is same for every URL we are dealing with.
To do that, open the main.js and add following line there after importing,
axios.defaults.baseURL = "http://localhost:8080/api/library"
So after the change main.js should look like below,
import Vue from 'vue'
import App from './App.vue'
import router from './router'
import vuetify from './plugins/vuetify';

//axios
import axios from 'axios'
import VueAxios from 'vue-axios'

Vue.config.productionTip = false
//axios
Vue.use(VueAxios, axios)

axios.defaults.baseURL = "http://localhost:8080/api/library"

new Vue({
  router,
  vuetify,
  render: function (h) { return h(App) }
}).$mount('#app')
Now our app has the ability to access third-party API and read and write data. Let’s move to defining UI components.
UI Components
In this tutorial, we have 4 main components and those are, Author, Book, Member and Dashboard. create 4 components with naming as mentioned names with .vue extension inside src/components folder first.
Then copy the following base implementation of vue component into those files and rename the component name value with the correct component name in that file.
Eg:- Author.vue file,
<template>
 <h1>Author Works</h1>
</template>
<script>
export default {
  name: "Author",
  data() {
    return {
    };
  },
  methods: {
  },
  mounted() {
  },
};
</script>
Vue Router Configuration
Then we should setup Routing inside this project,
Add the following changes inside src/router/index.js,
Here we are setting the Dashboard UI component to load with root URL (‘/’), and setting other UIs under separate URL paths.
import Vue from 'vue'
import VueRouter from 'vue-router'
import Dashboard from '../components/Dashboard.vue'
import Author from '../components/Author.vue'
import Book from '../components/Book.vue'
import Member from '../components/Member.vue'

Vue.use(VueRouter)

const routes = [
  {
    path: '/',
    name: 'Dashboard',
    component: Dashboard
  },
  {
    path: '/author',
    name: 'Author',
    component: Author
  },
  {
    path: '/book',
    name: 'Book',
    component: Book
  },
  {
    path: '/member',
    name: 'Member',
    component: Member
  }
]

const router = new VueRouter({
  routes
})

export default router
Now our app is ready with all the default UI components, Let’s add the changes into the App.vue which is needed to there in order to load router-based UI components.
go to src/app.vue and remove all the content and add the following in to that.
<template>
  <v-app>
    <router-view></router-view>
  </v-app>
</template>

<script>

export default {
  name: 'App',

  components: {
  },

  data: () => ({
    //
  }),
};
</script>
Here we are setting ‘
additionally, using
start the application and access any URL which we define above. It will show something like below in your browser.
eg:- http://localhost:8081/#/member
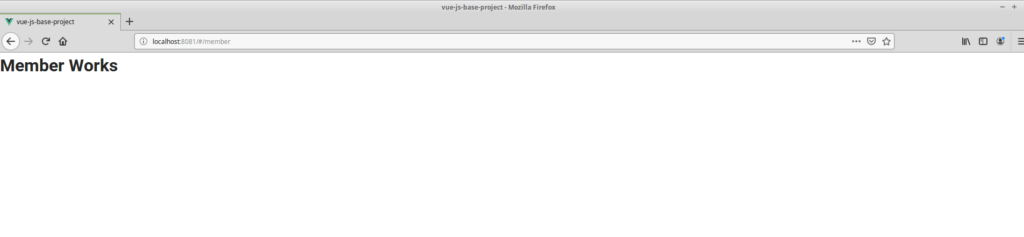
Default Member UI
Placing Base UI with Main Menu
Now our application has routing enabled and all the components are defined with default values. let’s add the menu and base UI structure to the project.
Open src/App.vue and replace its content with following,
<template>
  <v-app id="inspire">
    <v-app-bar app color="white" flat>
      <v-container class="py-0 fill-height">

        <!-- Menu Buttons -->
        <v-btn to="/" text>Dashboard</v-btn>
        <v-btn to="/author" text>Author</v-btn>
        <v-btn to="/book" text>Book</v-btn>
        <v-btn to="/member" text>Member</v-btn>

        <v-spacer></v-spacer>

        <v-responsive max-width="260"> </v-responsive>
      </v-container>
    </v-app-bar>

<!-- Main content -->
    <v-main class="grey lighten-3">
      <v-container>
        <v-row>
          <v-col>
            <v-sheet min-height="70vh" rounded="lg">
              <!-- -->
              <router-view></router-view>
            </v-sheet>
          </v-col>
        </v-row>
      </v-container>
    </v-main>
  </v-app>
</template>

<script>
export default{
  name: "App",

  components: {
  },

  data: () => ({
  }),
};
</script>
<style>
</style>
Here We are setting a set of v-btn (vuetify buttons) as with act as a router-link and use those as the main menu. Additionally use a separate area to load UI components in the middle.
start the application and you could see the main menu and other UI placements.
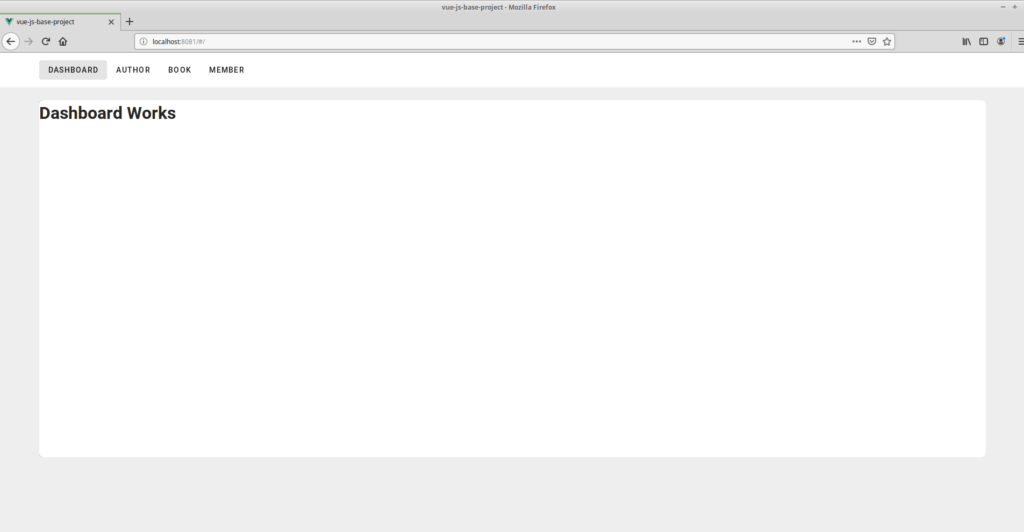
Author Registration UI Component
This is a simple UI of registration UI with two input fields like first name and lastname, and table view to show all the registered authors.
Here this UI will cover POST and GET method calling with REST API.
Add following content in to the Author.vue in order to setup author registration UI.
change data() inside javascript to following, Here we are creating the parameters to handle the UI and the methods we need to define on this UI.
additionally I’m using mounted(), to process things on page load.
So we are importing api service which we have developed earlier to call the API requests from this UI.
import api from "@/service/apiService";

export default {
  name: "Author",
  data() {
    return {
      userRegistration: {
        firstName: "",
        lastName: "",
      },
      registeredAuthors: [],
      responseSuccess: false
    };
  },
  methods: {
    readAuthors: async function() {
      const data = await api.readAuthors();
      this.registeredAuthors = data;
    },
    createAuthor: async function() {
      const requestData = {
        firstName: this.userRegistration.firstName,
        lastName: this.userRegistration.lastName,
      };
      await api.createAuthor(requestData);
      this.userRegistration.firstName = "";
      this.userRegistration.lastName = "";
      this.readAuthors();
      this.responseSuccess = true;
    },
  },
  mounted() {
    this.readAuthors();
  },
};
Then remove and add following content in to the html part in that Author.vue,
<template>
  <v-container>
    <h1>Author Management UI</h1>
    <p>This UI developed to handle Author Registration.</p>
    <v-row>
      <v-col sm="12">
        <v-alert v-if="responseSuccess" dense text type="success">
          You have successfully added author.
        </v-alert>
      </v-col>
      <v-col sm="6">
        <h3>Author Registration</h3>
        <v-text-field
          v-model="userRegistration.firstName"
          label="First name"
        ></v-text-field>
        <v-text-field
          v-model="userRegistration.lastName"
          label="Last name"
        ></v-text-field>
        <v-btn color="primary" v-on:click="createAuthor">
          Register
        </v-btn>
      </v-col>
      <v-col sm="6">
        <h3>Registered Authors</h3>
        <v-simple-table>
          <template v-slot:default>
            <thead>
              <tr>
                <th class="text-left">
                  ID
                </th>
                <th class="text-left">
                  First Name
                </th>
                <th class="text-left">
                  Last Name
                </th>
              </tr>
            </thead>
            <tbody>
              <tr v-for="author in registeredAuthors" :key="author.id">
                <td>{{ author.id }}</td>
                <td>{{ author.firstName }}</td>
                <td>{{ author.lastName }}</td>
              </tr>
            </tbody>
          </template>
        </v-simple-table>
      </v-col>
    </v-row>
  </v-container>
</template>
Now you can register a author using this UI communicating with REST API.
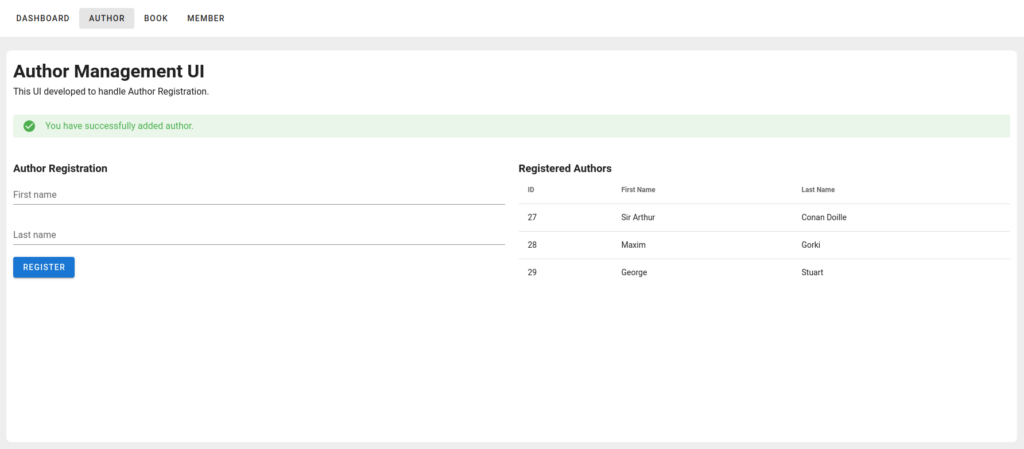
Author Registration UI
Book Registration and Update UI Component
Now we have the way of registering an author, and in this UI it will cover all the REST concepts like GET, POST, DELETE and PATCH using following scenarios,
- Book registration – POST
- Reading registered books – GET
- Delete a book – DELETE
- Update a book – PATCH
First, add the following snippet into the javascript section in your Book.vue.
import api from "@/service/apiService";
export default {
  name: "Book",
  data() {
    return {
      bookRegistration: {
        bookname: "",
        isbn: "",
        authorId: "",
      },
      authors: [],
      books: [],
      editingId : 0,
      responseSuccess: false
    };
  },
  methods: {
    createBook: async function() {
      const bookRequest = {
        name: this.bookRegistration.bookname,
        isbn: this.bookRegistration.isbn,
        authorId: this.bookRegistration.authorId,
      };
      const data = await api.createBook(bookRequest);
      this.bookRegistration.bookname = "";
      this.bookRegistration.isbn = "";
      this.bookRegistration.authorId = "";
      this.readBooks();
      this.responseSuccess = true;
    },
    readAuthors: async function() {
      const data = await api.readAuthors();
      this.authors = data;
    },
    readBooks: async function() {
      const data = await api.readBooks();
      this.books = data;
    },
    deleteBook: async function(bookId) {
      const data = await api.deleteBook(bookId);
      this.readBooks();
    },
    initiateEdit: async function (bookId) {
      this.editingId = bookId;
      const bookData = await api.readBook(this.editingId);
      this.bookRegistration.bookname = bookData.name;
      this.bookRegistration.isbn = bookData.isbn;
      this.bookRegistration.authorId = bookData.author.id;
    },
    editBook : async function () {
      console.log("Editing : "+this.editingId)
      const bookRequest = {
        name: this.bookRegistration.bookname,
        isbn: this.bookRegistration.isbn,
        authorId: this.bookRegistration.authorId,
      };
      const data = await api.updateBook(this.editingId, bookRequest);
      this.bookRegistration.bookname = "";
      this.bookRegistration.isbn = "";
      this.bookRegistration.authorId = "";
      this.editingId = 0;
      this.readBooks();
    }
  },
  mounted() {
    this.readAuthors();
    this.readBooks();
  },
};
Here we are using the registered authors from the previous UI and load those into a select box in this UI.
<v-autocomplete
          :items="authors"
          color="white"
          item-value="id"
          item-text="firstName"
          label="Author"
          v-model="bookRegistration.authorId"
        ></v-autocomplete>
Additionally keep editingId to switch Edit button and Register button switching.
Adding dynamic buttons in Table view to DELETE and initiate UPDATE in this view.

Dynamic Edit and Delete buttons on UI.
add the following into the UI HTML part inside the Book.vue,
<v-container>
    <h1>Book Management UI</h1>
    <p>This UI developed to handle Book Registration and Edits</p>
    <v-row>
      <v-col sm="12">
        <v-alert v-if="responseSuccess" dense text type="success">
          You have successfully added book.
        </v-alert>
      </v-col>
      <v-col sm="6">
        <h3>Book Registration</h3>
        <v-text-field
          v-model="bookRegistration.bookname"
          label="Name"
        ></v-text-field>
        <v-text-field
          v-model="bookRegistration.isbn"
          label="ISBN"
        ></v-text-field>
        <v-autocomplete
          :items="authors"
          color="white"
          item-value="id"
          item-text="firstName"
          label="Author"
          v-model="bookRegistration.authorId"
        ></v-autocomplete>

        <v-btn v-if="editingId" color="success" v-on:click="editBook">
          Edit
        </v-btn>
        <v-btn v-else color="primary" v-on:click="createBook">
          Register
        </v-btn>
      </v-col>
      <v-col sm="6">
        <h3>Registered Books</h3>
        <v-simple-table>
          <template v-slot:default>
            <thead>
              <tr>
                <th class="text-left">
                  ID
                </th>
                <th class="text-left">
                  First Name
                </th>
                <th class="text-left">
                  Last Name
                </th>
                <th class="text-left">
                  Action
                </th>
              </tr>
            </thead>
            <tbody>
              <tr v-for="book in books" :key="book.id">
                <td>{{ book.id }}</td>
                <td>{{ book.name }}</td>
                <td>{{ book.isbn }}</td>
                <td>
                  <v-btn icon color="pink" v-on:click="deleteBook(book.id)">
                    <v-icon>mdi-delete</v-icon>
                  </v-btn>
                  <v-btn icon color="blue" v-on:click="initiateEdit(book.id)">
                    <v-icon>mdi-pencil-box-outline</v-icon>
                  </v-btn>
                </td>
              </tr>
            </tbody>
          </template>
        </v-simple-table>
      </v-col>
    </v-row>
  </v-container>
Now we are ready with the book registration and editing part as well.
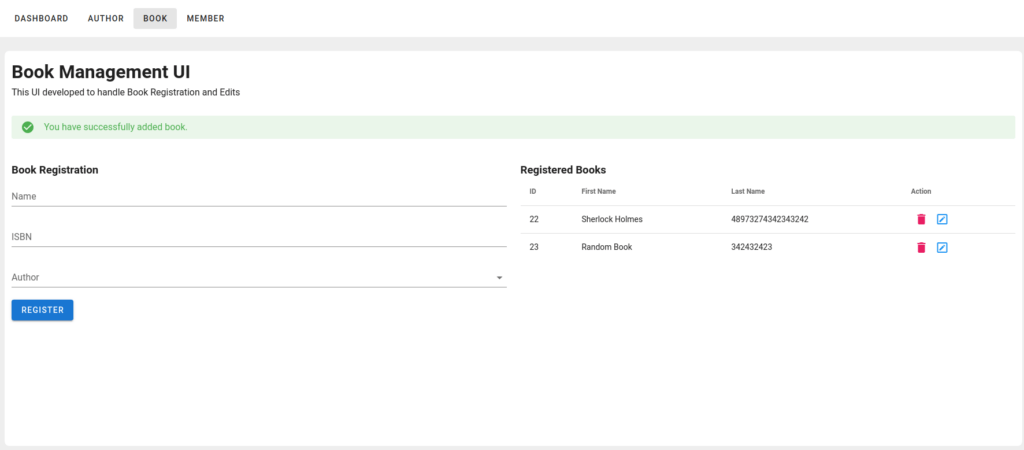
book registration and update view
Now we have completed the base requirement, additionally we needs to have a way of registering members inside this application.
Member Registration UI Component
This is simple UI which is same like Author Registration. Just paste following content into the Member.vue in your poject.
<template>
  <v-container>
    <h1>Member Management UI</h1>
    <p>This UI developed to handle Member Registration.</p>
    <v-row>
      <v-col sm="12">
        <v-alert v-if="responseSuccess" dense text type="success">
          You have successfully added member.
        </v-alert>
      </v-col>
      <v-col sm="6">
        <h3>Member Registration</h3>
        <v-text-field
          v-model="memberRegistration.firstName"
          label="First name"
        ></v-text-field>
        <v-text-field
          v-model="memberRegistration.lastName"
          label="Last name"
        ></v-text-field>
        <v-btn color="primary" v-on:click="createMember">
          Register
        </v-btn>
      </v-col>
      <v-col sm="6">
        <h3>Registered Members</h3>
        <v-simple-table>
          <template v-slot:default>
            <thead>
              <tr>
                <th class="text-left">
                  ID
                </th>
                <th class="text-left">
                  First Name
                </th>
                <th class="text-left">
                  Last Name
                </th>
              </tr>
            </thead>
            <tbody>
              <tr v-for="member in registeredMembers" :key="member.id">
                <td>{{ member.id }}</td>
                <td>{{ member.firstName }}</td>
                <td>{{ member.lastName }}</td>
              </tr>
            </tbody>
          </template>
        </v-simple-table>
      </v-col>
    </v-row>
  </v-container>
</template>
<script>
import api from "@/service/apiService";
export default {
  name: "Member",
  data() {
    return {
      memberRegistration: {
        firstName: "",
        lastName: "",
      },
      registeredMembers: [],
      responseSuccess: false,
    };
  },
  methods: {
    readMembers: async function() {
      const data = await api.readMembers();
      this.registeredMembers = data;
    },
    createMember: async function() {
      const requestData = {
        firstName: this.memberRegistration.firstName,
        lastName: this.memberRegistration.lastName,
      };
      await api.createMember(requestData);
      this.memberRegistration.firstName = "";
      this.memberRegistration.lastName = "";
      this.readMembers();
      this.responseSuccess = true;
    },
  },
  mounted() {
    this.readMembers();
  },
};
</script>
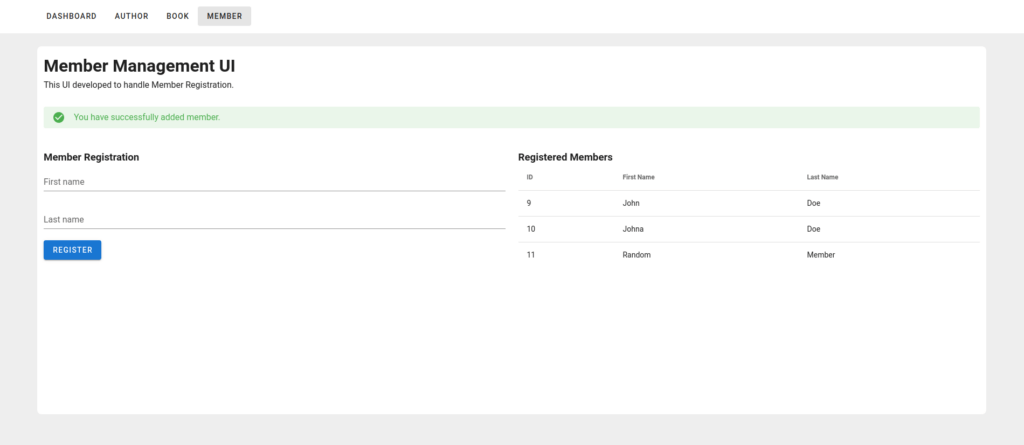
Member Registration UI
Now we only needs to have that UI where we set Book Lending,
Book Burrowing Dashboard UI Component
In this UI we have two select boxes where user can choose one member and multiple books to burrow.
additionally, there is a dynamic table where it shows the selected books to burrow.
Here we are loading registered members and books to a select box from the API.
and specially use selectedBooks list to handle book selection on single request.
Here I’m using list.push() to add books to this list and use following function to remove selected books from this UI.
Adding books,
const bookData = await api.readBook(this.bookLending.selectedBook);
      console.log("Added Book " + bookData.id);
      this.selectedBooks.push(bookData);
removing books from UI,
this.selectedBooks = this.selectedBooks.filter(
        (book) => book.id != bookId
      );
Replace your content on Dashboard.vue with following,
<template>
  <v-container>
    <h1>Welcome to the library</h1>
    <p>Library system by Javatodev.com.</p>
    <v-row>
      <v-col sm="12">
        <v-alert v-if="responseSuccess" dense text type="success">
          You have successfully added book lending request.
        </v-alert>
      </v-col>
      <v-col sm="4">
        <h3>Burrow a Book - Book Lending</h3>
        <v-autocomplete
          :items="members"
          color="white"
          item-value="id"
          item-text="firstName"
          label="Member"
          v-model="bookLending.memberId"
        ></v-autocomplete>
        <v-autocomplete
          :items="books"
          color="white"
          item-value="id"
          item-text="name"
          label="Books"
          v-model="bookLending.selectedBook"
        ></v-autocomplete>
        <v-btn depressed color="default" v-on:click="addBook">
          Add Book
        </v-btn>
        <v-btn color="success" v-on:click="lendBook">
          Lend The Books
        </v-btn>
      </v-col>
      <v-col sm="8">
        <h3>Selected Books</h3>
        <v-simple-table>
          <template v-slot:default>
            <thead>
              <tr>
                <th class="text-left">
                  ID
                </th>
                <th class="text-left">
                  Name
                </th>
                <th class="text-left">
                  ISBN
                </th>
                <th class="text-left">
                  Action
                </th>
              </tr>
            </thead>
            <tbody>
              <tr v-for="book in selectedBooks" :key="book.id">
                <td>{{ book.id }}</td>
                <td>{{ book.name }}</td>
                <td>{{ book.isbn }}</td>
                <td>
                  <v-btn icon color="pink" v-on:click="removeBook(book.id)">
                    <v-icon>mdi-delete</v-icon>
                  </v-btn>
                </td>
              </tr>
            </tbody>
          </template>
        </v-simple-table>
      </v-col>
    </v-row>
  </v-container>
</template>
<script>
import api from "@/service/apiService";

export default {
  name: "Dashboard",
  data() {
    return {
      bookLending: {
        selectedBook: 0,
        memberId: "",
      },
      members: [],
      books: [],
      selectedBooks: [],
      responseSuccess: false,
    };
  },
  methods: {
    readMembers: async function() {
      const data = await api.readMembers();
      this.members = data;
    },
    readBooks: async function() {
      const data = await api.readBooks();
      this.books = data;
    },
    lendBook: async function() {
      console.log("Lending Books");
      let selectedIds = [];
      this.selectedBooks.forEach((book) => {
        selectedIds.push(book.id);
      });
      console.log("Lending Books " + selectedIds);
      const request = {
        bookIds: selectedIds,
        memberId: this.bookLending.memberId,
      };
      const bookLendingResponse = await api.lendBook(request);
      console.log(bookLendingResponse);
      this.responseSuccess = true;
      this.selectedBooks = [];
      this.bookLending.selectedBook = 0;
      this.bookLending.memberId = "";
    },
    addBook: async function() {
      console.log("Adding Book" + this.bookLending.selectedBook);
      const bookData = await api.readBook(this.bookLending.selectedBook);
      console.log("Added Book " + bookData.id);
      this.selectedBooks.push(bookData);
    },
    removeBook: function(bookId) {
      console.log("Removing Book " + bookId);
      this.selectedBooks = this.selectedBooks.filter(
        (book) => book.id != bookId
      );
    },
  },
  mounted() {
    this.readBooks();
    this.readMembers();
  },
};
</script>
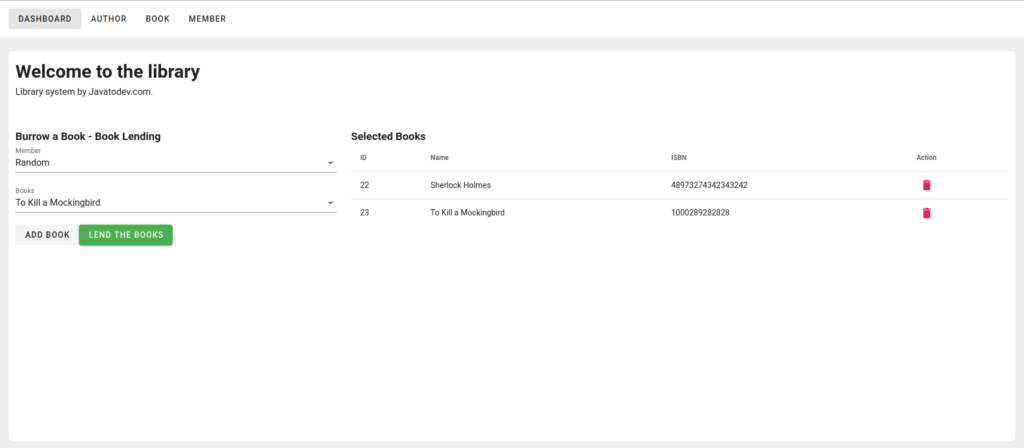
Library Dashboard UI Component
All done now our Vue JS CRUD application is ready to communicate with spring boot REST API.
Conclusion
All done, Now I hope you have a good understanding of how to develop a Vue JS frontend with REST API developed using Spring Boot. Comment on your ideas or issues you are facing while developing your Spring boot API.
You can find source codes for this tutorial from our Github.