Microservices - Authentication, and Authorization With Keycloak
-
 Chinthaka Dinadasa
 - 17 May, 2021
Hello readers, For the moment I’ve completed our microservice article series up to configuring the API gateway. So now we can check how we could configure microservices authentication and authorization by configuring auth layer to the API gateway. Here I’m going to use Keycloak which is a really handy open-source identity and access management tool.
Authentication and Authorization Setup
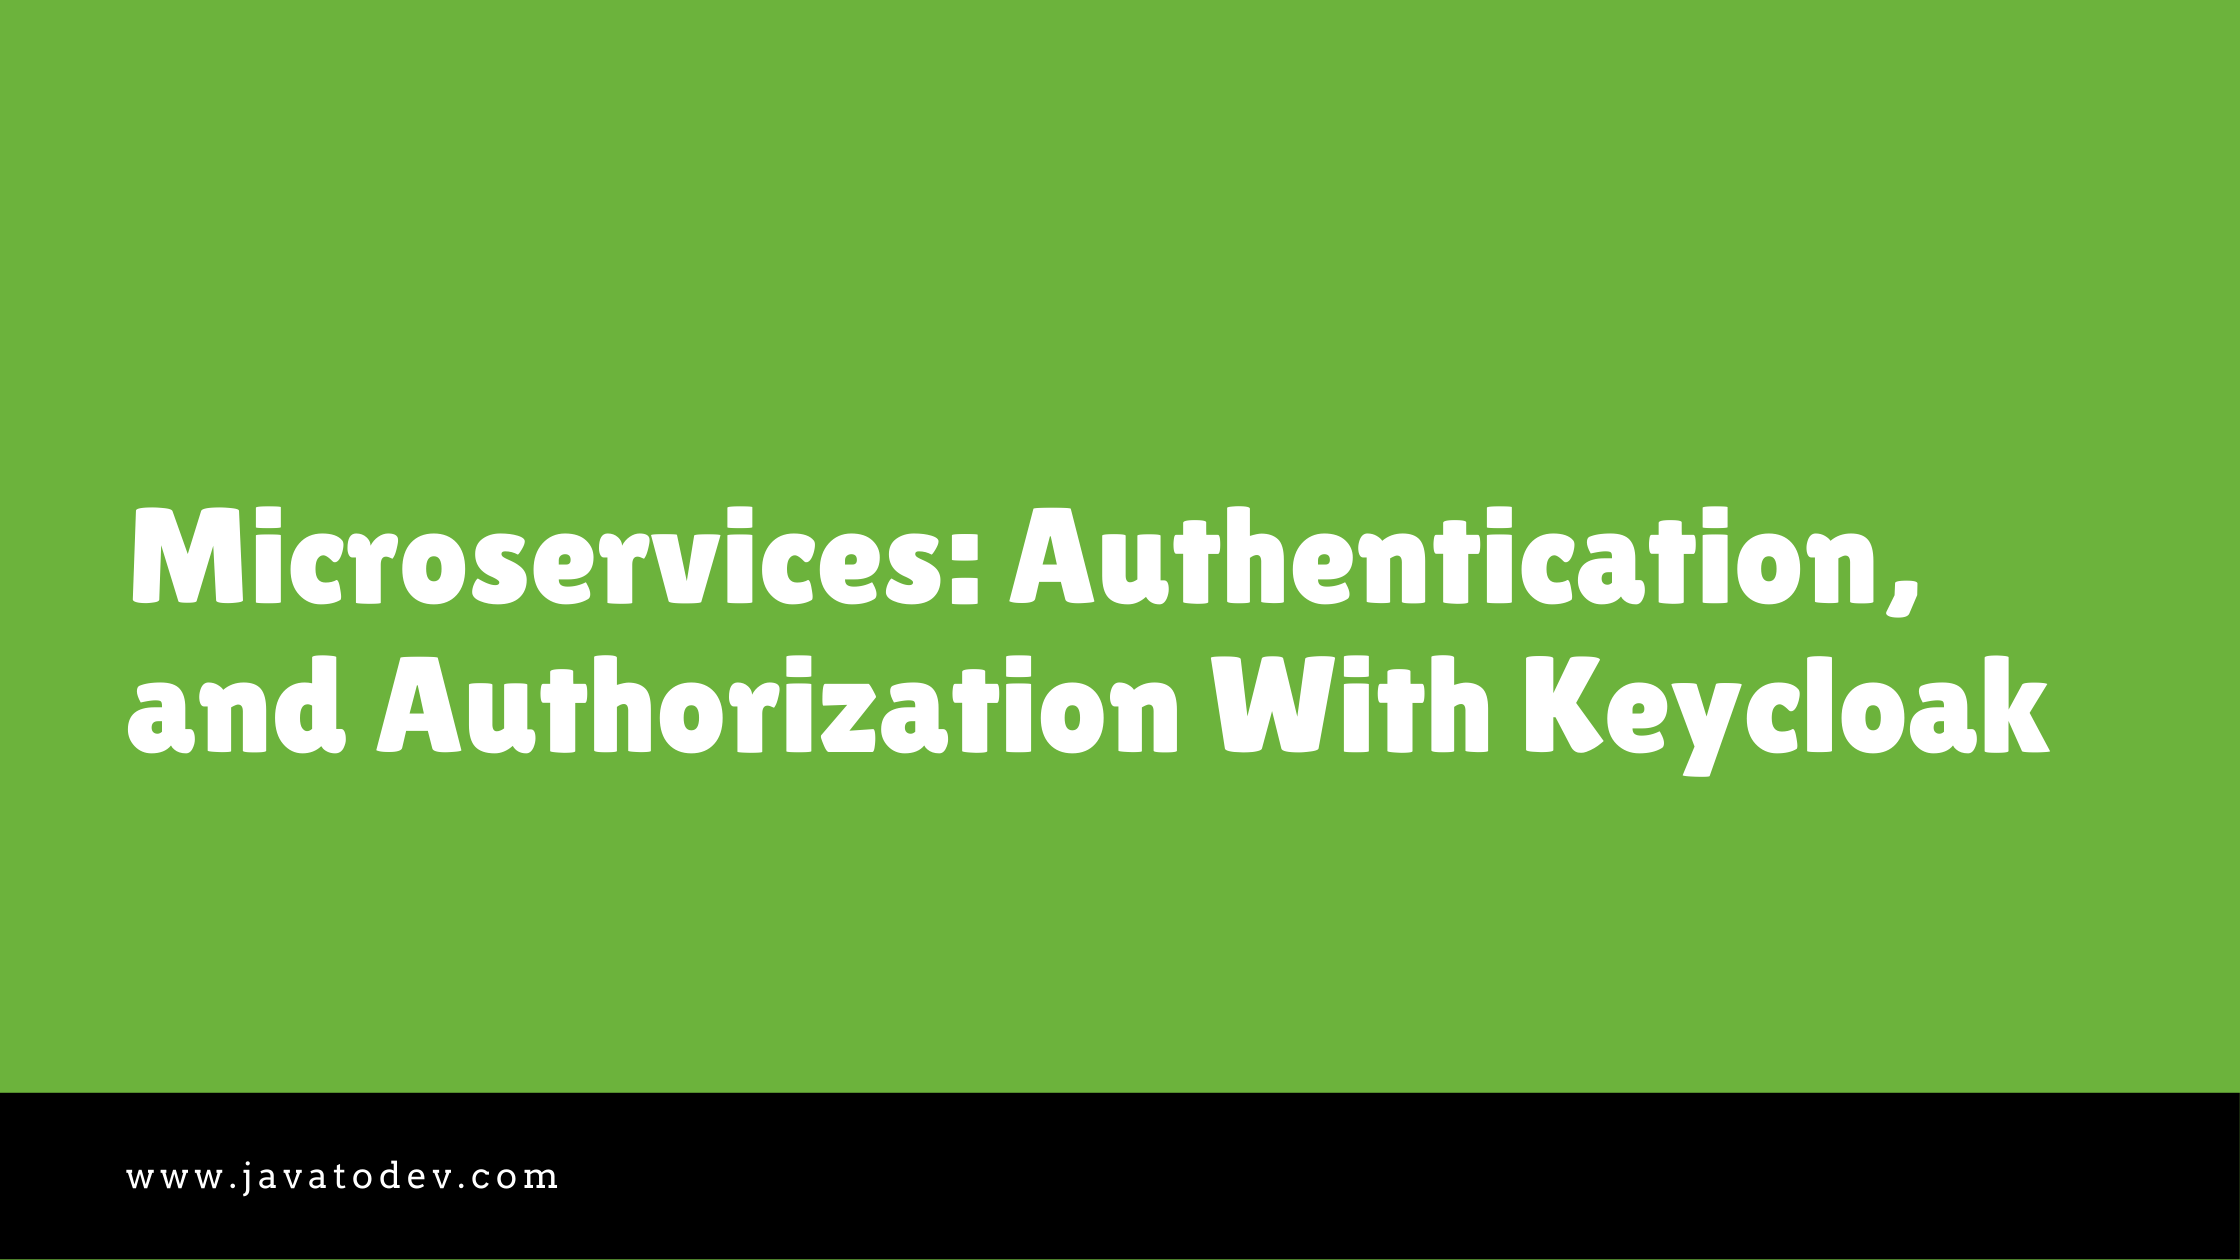
Here I’m going to build the following setup to introduce authentication and authorization to microservices using keycloak.
Authentication and authorization in microservice using keycloak
Here I’m going to introduce the authentication and authorization layer only to the API gateway and all other services will be using infrastructure level authentication to avoid direct access. So basically our API gateway is the only place that is accessible to the public and other places are accessible only via the API gateway.
Furthermore If you needs to have authentication to all the services you are free to do that, even the keycloak support single sign on (SSO) which is really easily configurable with Spring boot.
Setting Up Keycloak
Keycloak is an open-source Identity and access management tool, which you could easily run on your local machine or a server. Here I’ll run the keycloak instance as a docker container on my local machine, But if you prefer you can start a keycloak instance using any other way described here.
If you are using apple M1 silicon MacBook, There might be issues with versions on the keycloak docker hub, In my experience, I’m using wizzn/keycloak:12 M1 MacBook since for the moment(May-2021) official docker images for keycloak is making errors with M1 MacBook.
Use following command to start keycloak as a docker container, and here I’m using maria DB instance for data storage. Hence first start the MariaDB instance before starting keycloak.
$ docker run --restart unless-stopped -p 3306:3306 -d --name mariadb --net keycloak-network -e MYSQL_ROOT_PASSWORD=password -e MYSQL_DATABASE=keycloak -e MYSQL_USER=keycloak -e MYSQL_PASSWORD=password mariadb
after that start the keycloak server with connecting to that mariadb instance created above,
$ docker run --restart unless-stopped -d -p 8080:8080 -e KEYCLOAK_USER=admin -e KEYCLOAK_PASSWORD=admin --name keycloak --net keycloak-network jboss/keycloak:12.0.3
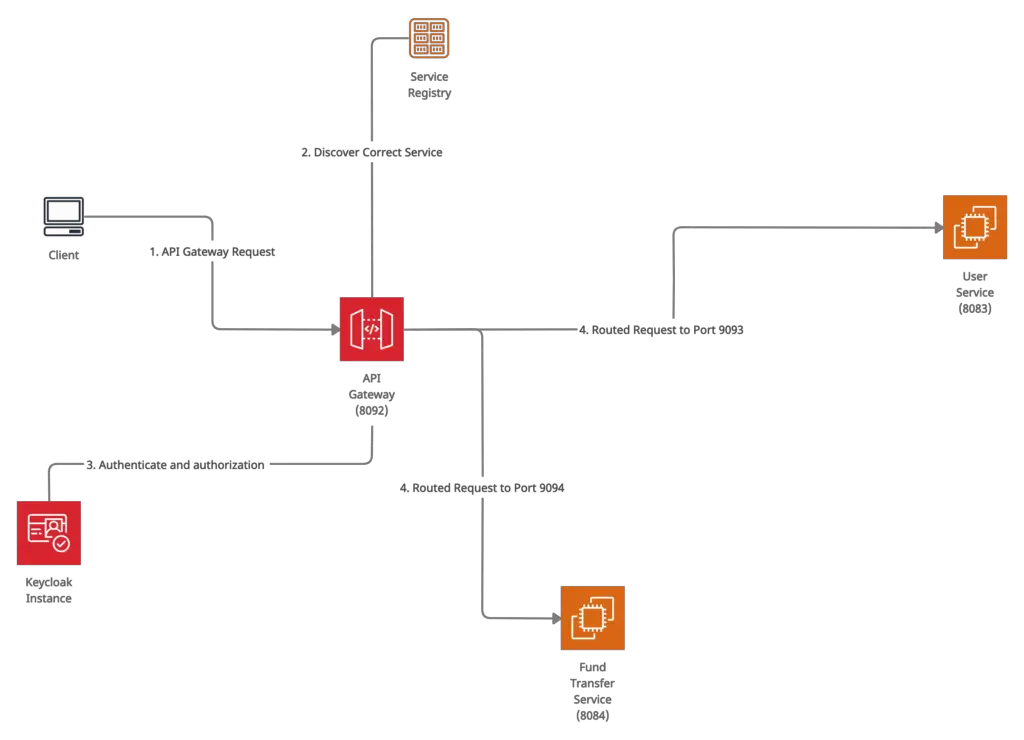
Now we are ready with keycloak instance and access the keycloak dashboard for other changes. Here my local keycloak instance is accessible via http://localhost:8080/auth.
Keycloak Dashboard
After that login to the Administration Console using username and password we set on docker command, Here it is admin/admin.
Now we should create a new realm and client in order to use with our microservices project. Here I’ll go to name our realm “javatodev-internet-banking“.

Create keycloak realm
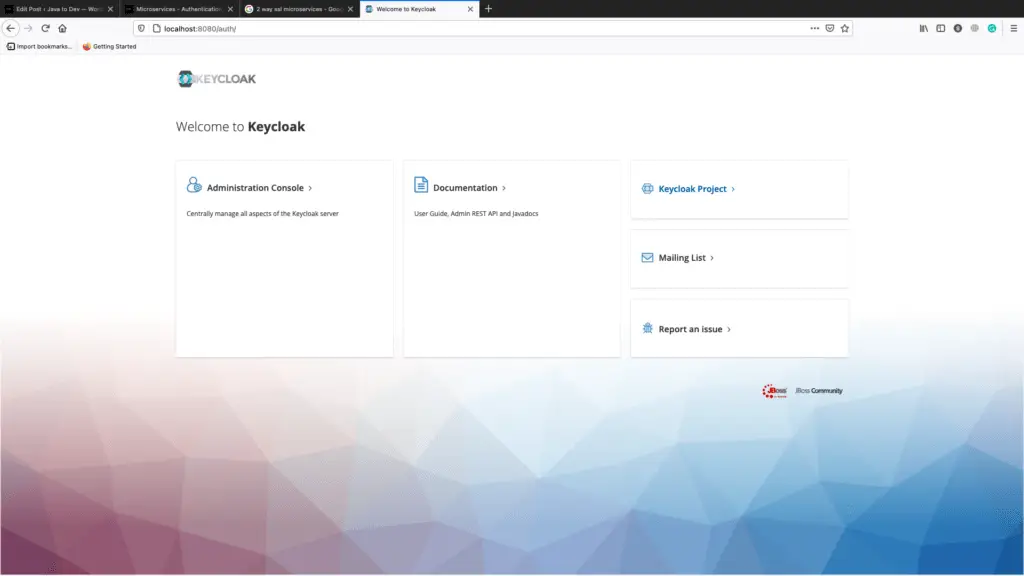
Now we needs to have a client, Just access the client registration page and create client with following details.
Create a client with keycloak admin panel
By default client access type is public, But here we need to have a confidential client in order to use with spring cloud gateway. So just change it as confidential then put redirect URL as * for the moment and copy the client id and secret from the credentials tab.

Client properties tab in keycloak dashboard
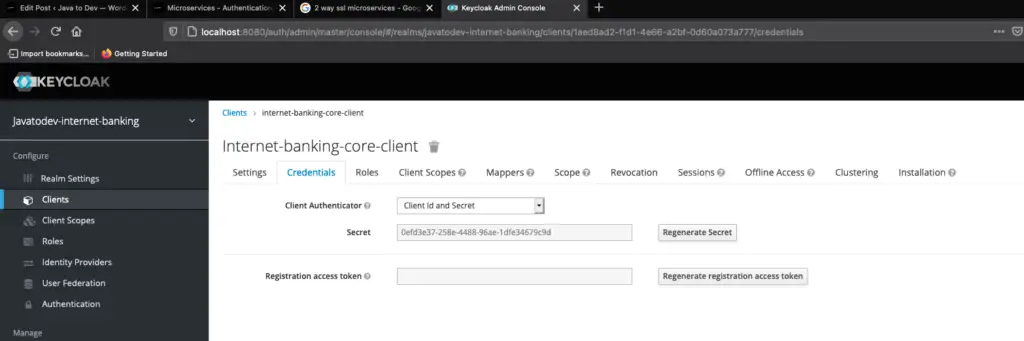
Client credentials tab in keycloak
Up to now, we have configured realm and client in keycloak in order to use with our API gateway. Let’s create a user inside this realm to access the API. Basically, this user will be a super admin for this application.
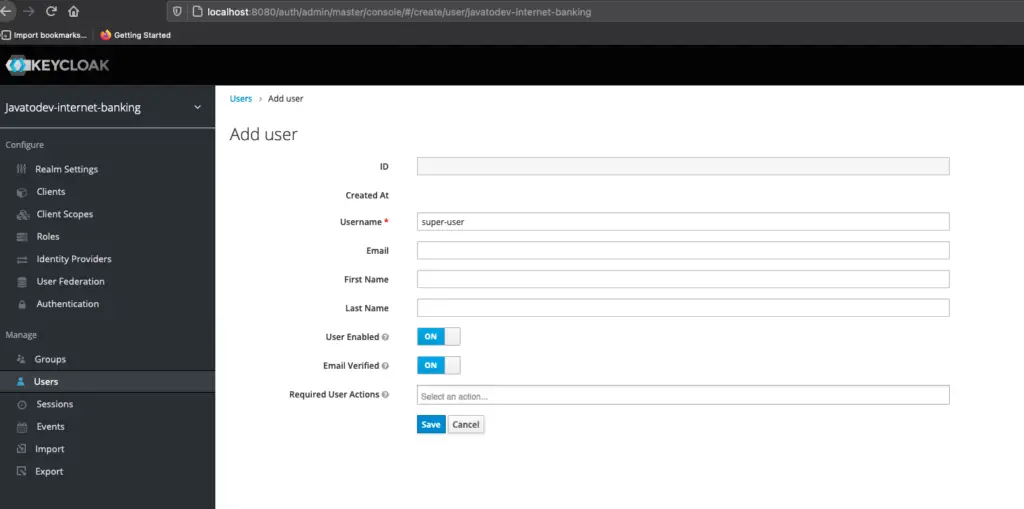
User creation on keycloak dashboard
After that just access the user related page and set a password for that user.
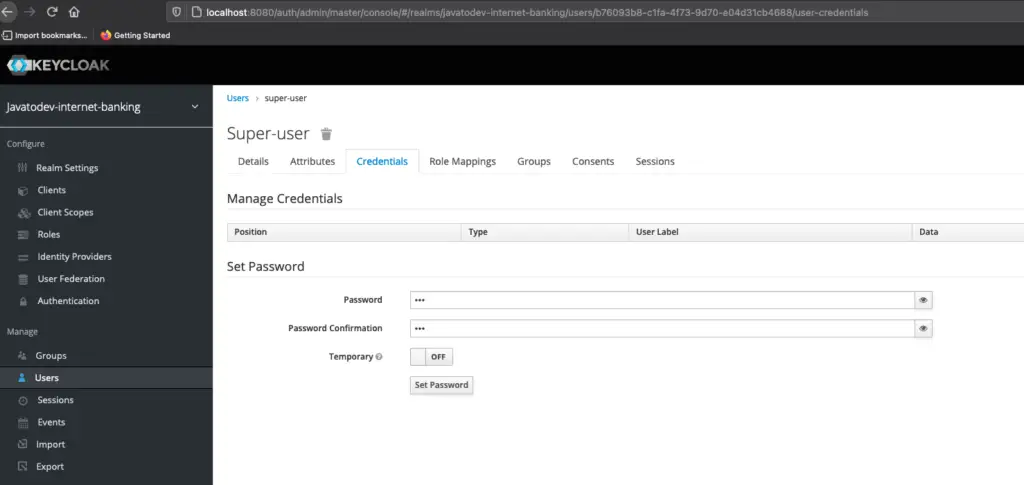
Setting credentials for user in keycloak admin panel
Now we have all the configurations to work with keycloak. This is the minimal setup that I’m going to create in keycloak, and there are multiple things that we could set up in keycloak and I’ll write another article for keycloak with spring book configurations.
Enable Oauth2.0 With Keycloak For Spring Cloud API Gateway
Now we can start setting up our API gateway to authenticate and authorize with keycloak based Oauth2.0 authentication. To do that I’ll go to use the spring security library and configure that to use Keycloak as a Oauth 2.0 provider.
First let’s add following libraries which enables spring security features while connecting this API gateway to the keycloak as a security client.
implementation 'org.springframework.boot:spring-boot-starter-oauth2-client'
implementation 'org.springframework.boot:spring-boot-starter-oauth2-resource-server'
Then apply following configurations into the application.yml.
#SECURITY BASED CONFIGURATIONS
app:
  config:
    keycloak:
      url: http://localhost:8080/auth
      realm: javatodev-internet-banking

spring:
  security:
    oauth2:
      client:
        provider:
          keycloak:
            token-uri: ${app.config.keycloak.url}/realms/${app.config.keycloak.realm}/protocol/openid-connect/token
            authorization-uri: ${app.config.keycloak.url}/realms/${app.config.keycloak.realm}/protocol/openid-connect/auth
            user-name-attribute: preferred_username
            user-info-uri: ${app.config.keycloak.url}/realms/${app.config.keycloak.realm}/protocol/openid-connect/userinfo
            jwk-set-uri: ${app.config.keycloak.url}/realms/${app.config.keycloak.realm}/protocol/openid-connect/certs
            user-info-authentication-method: header
        registration:
          internet-banking-core-client:
            provider: keycloak
            client-id: internet-banking-core-client
            client-secret: 0efd3e37-258e-4488-96ae-1dfe34679c9d
            authorization-grant-type: authorization_code
            redirect-uri: http://localhost:8080/login/oauth2/code/keycloak
            scope: openid
      resourceserver:
        jwt:
          jwk-set-uri: ${app.config.keycloak.url}/realms/${app.config.keycloak.realm}/protocol/openid-connect/certs
Now we have only one @configuration class to add in order to complete our setup. I’ll create a configuration class basically the security configuration class for this API gateway to complete the authentication setup.
Just add the following class as a @Configuration class to the API gateway application. In this class, I’m allowing our Registration API URL to access without any authentication. This API will be written on our next steps to create API endpoints on user creation.
package com.javatodev.finance.configuration;

import org.springframework.context.annotation.Bean;
import org.springframework.security.config.annotation.method.configuration.EnableReactiveMethodSecurity;
import org.springframework.security.config.annotation.web.reactive.EnableWebFluxSecurity;
import org.springframework.security.config.web.server.ServerHttpSecurity;
import org.springframework.security.web.server.SecurityWebFilterChain;

@EnableWebFluxSecurity
@EnableReactiveMethodSecurity
public class SecurityConfiguration {
    @Bean
    public SecurityWebFilterChain securityWebFilterChain(ServerHttpSecurity http) {
        http
                .authorizeExchange()
                //ALLOWING REGISTER API FOR DIRECT ACCESS
                .pathMatchers("/user/api/v1/register").permitAll()
                //ALL OTHER APIS ARE AUTHENTICATED
                .anyExchange().authenticated()
                .and()
                .csrf().disable()
                .oauth2Login()
                .and()
                .oauth2ResourceServer()
                .jwt();
        return http.build();
    }
}
Testing with API
Let’s start the service registry, API gateway and user service or fund transfer service to test our current application stage.

All services up and running with service registry
I’m using Postman to test these API’s and I’ll attach the postman collection with updates to the source code. Please import those to your postman, if you need them. Additionally, you can access the same collection using the below link.

Let’s generate a token from our keycloak, so here following are the values that we should add in keycloak Oauth2.0 token generation window.
- Access token URL: http://localhost:8080/auth/realms/javatodev-internet-banking/protocol/openid-connect/token
- Client ID: internet-banking-core-client
- Client Secret: 0efd3e37-258e-4488-96ae-1dfe34679c9d
- Username: super-user
- Password: 123
- Scope: email

Generate authentication token with Postman from Keycloak
After generating a valid authentication token from keycloak, Just copy it and use it as a bearer token in keycloak. Then send a request to API Actuator Endpoint and it should be accessible.
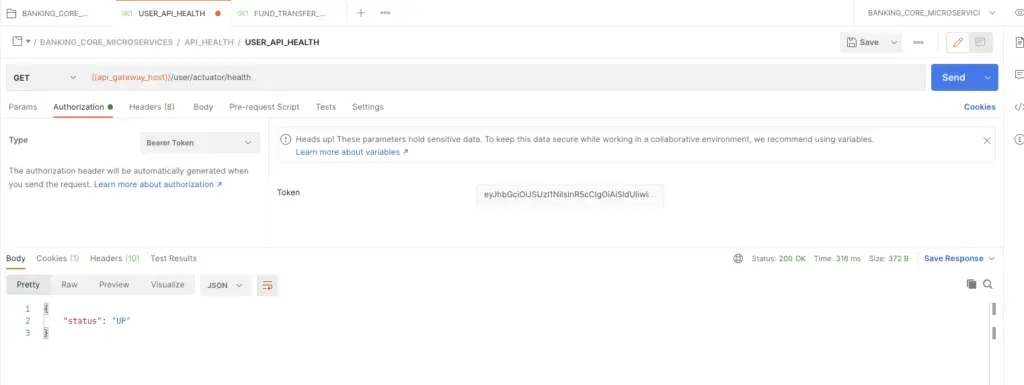
Health Enpoint is accessible with a valid authentication token
Now we have configured authentication and authorization with keycloak into the API gateway in microservices. Let’s see how we can develop pending API endpoints to achieve minimal Internet banking application setup in our next article.
Conclusion
Thanks for reading our latest article on Microservices Authentication, and Authorization With Keycloak with practical usage.
If you are looking for spring boot based practical application development tutorials, just check our article series.
You can get the source code for this tutorial from our GitHub repository.